Monday, December 27, 2010

A Not So Merry Xmas ☻


Supplies Needed

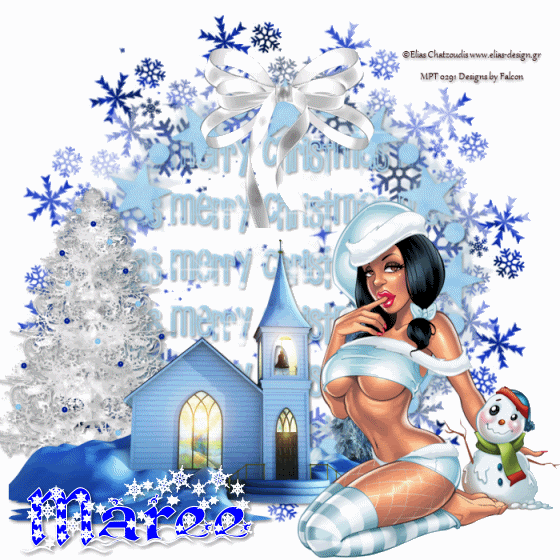
Tube I'm using the artwork of Zindy Neilson, you find it Here.
Scrapkit by Designs by Vaybs FTU is Dark Christmas 2010 ,
you can find it Here.
Font: Chilly Moe
Drop Shadow of choice.
Mask wsl_81 by Weescotslass
Remember to Save Often!!!

Let's create

Open new image 680 x 600.
New layer Select all open DBV-DarkXmasPaper 1 paste into selection,apply mask.
Open DBV_DarkXmasFrame 3,click inside frame with Magic Wand-
Selections-modify-expand by 4.
New layer paste DBV_BlackXmasPaper 11 into selection.
Selections-Invert-Delete, move below frame layer.
Add your tube adjust to fit frame.
Open DBV_BlackXmasElement 23 resize 75 percent Image-Mirroe
move to bottom of frame.
Open DBV_BlackXmasElement 46 resize 75 percent place on left of frame.
Open DBV_BlackXmasElement 4 paste below frame layer on right side of frame.
Open DBV_BlackXmasElement 41 resize 75 percent place on table.
OPen DBV_BlackXmasElement 34 resize 43 percent place ontop of tree.
Open DBV_BlackXmasElement 17 resize 85 percent Image -Mirror-
place on right side of frame.
Open DBV_BlackXmasElement 18 rresize 53 percent
place on right bottom corner, see tag.
Open DBV_BlackXmasElement 25 resize 40 percent
place on bottom of frame.
Open DBV_BlackXmasElements 11 & 39 place at bottom of tree.
Select Elements 23 & 46 and apply EyeCandy 5 Impact-
Gradient Glow with these settings:


Give all a Drop Shadow 2/2/50/5.

Add your Artist © and your name then crop and save.
This is only a guide and feel free to use any other element you wish.
Most of all have fun creating.

If you wish to email me your creation, I then can show off your wonderful creations.
Thank you for using my tutorial.

Written by Maree (aka Falcon) on 28 December 2011
Any similarities to this tutorial are purely coincidental
© Maree(aka Falcon)

Happy New Year 2011 ♥


Supplies Needed


Tube I'm using the artwork of Elias Chatzoudis, you find Here
Scrap kit by Laurie Made Me Scraps --Happy New Year FTU
you can find it Here.
Font: Jellyka Wester Prim
Drop Shadow of choice.
Mask vix_ mask332 by Vix
Monti's Blinds 1 Mask Here
Fireworks Here
Remember to Save Often!!!

Let's create

Open new image 700 x 700 flood fill with #ffffff.
new layer select all Irhappynyp4 paste into selection, deselect. Apply Vix-mask-merge group.
New layer select all Irhappynyp 2 paste into selection, deselect.
Apply Monti-mask, merge group.Duplicate.
Copy paste yur tube resize if needed, center tube.
Open IrhappynyEle's 66,67 and 71 place around your tube.
Open IrhappynyEle 7 pastemove to lower right side of layer
Open IrhappynyEle 53 paste in center of Ele 7
Open IrhappynyEle 38 move to middle of Ele 53 with Diamond in center of 0.
Open IrhappynyEle 57 place right side of tube.
Open IrhappynyEle 62 and 32 paste then place 32 in center of 62 bottom of tube.
Open IrhappynyEle 50 resize 75 percent place on left of tube.
Open IrhappynyEle 43 paste place on right side see tag.
Open IrhappynyEle 52 paste resize 65 percent move to left of tube,
Open IrhappynyEle 51 paste resize 60 percent, move to left of glass.
Open IrhappynyEle 17 paste move to bottom left.
Open IrhappynyEle 37 paste move to top of layer.
Using your Pick Tool + Crtl grab the top corner box
then angle it toward the middle,see below.

Give all a Drop Shadow
Add your Artist © and your name then crop and save.
If you want to Animate please continue.

This is only a guide and feel free to use any other element you wish.
Most of all have fun creating.

Animation
Open AS.
X-out all except Background,the mask layers,Ele 66,67,71,37 and ©.
Edit Copy Special-Copy Merged, click into AS paste as new animation.
Ctrl+L duplicate 11 times.
Back in Psp close out those layers and open all other layers.
In AS open animation I used set 3 & 5 Ctrl+A to select all copy and
paste them around the layer.
Play your animation to check all is ok.
Back in Psp Edit Copy special-Copy Merged paste as new Animation in AS.
Edit-Copy then paste Into Selected Frame,
play with it till you are happy with placement.
Resize and save as a Gif.

If you wish to email me your creation, I then can show off your wonderful creations.
Thank you for using my tutorial.

Written by Maree (aka Falcon) on 28 December 2010
Any similarities to this tutorial are purely coincidental
© Maree(aka Falcon)

Thursday, December 23, 2010

From Me 2 You ♥


Supplies Needed


Scrapkit by Shell Scraps, FTU called MerryChristmasPU ,
you can find it Here.
Font: of Choice
Drop Shadow of choice.
Mask_sdtMask04 by Sharlimar Designs
Mask wsl_84 by Weescotslass
Snow Here

Remember to Save Often!!!!

Let's create

Open new image 650 x 650.
New layer selelct all, open paper 1 paste into selection.
Apply mask04-merge grup.
Click inside frame with Magic Wand -Selections-Modify-Expand by 4.
Open Santa's house resize if needed then copy- paste on new layer, deselect.
Open Tree 1 resize 45 percent move to left of frame.
Open snowman 1 resize 75 percent place in lower-center of layer, see tag.
Open Sign 1 resize 45 percent place right side of layer.
Open Bow 1 resize 35 percent place at top of frame.
Open Paper 7 paste above background layer, apply mask 84, Merge group.

Add your Artist © and your name then crop and save.
This is only a guide and feel free to use any other element you wish.
Most of all have fun creating.

If you wish to email me your creation, I then can show off
your wonderful creations.
Thank you for using my tutorial.
Written by Maree (aka Falcon) on 23 December 2010
Any similarities to this tutorial are purely coincidental
© Maree(aka Falcon)

Season Blessings ♥


Supplies Needed


Tube I'm the artwork by Celine , you find it Here

Scrapkit byScrappiness Downunder FTU called LM121010 ,you can find it Here.

Font: HaloHandletter

Drop Shadow of choice.

Mask sdtMaskXMas18 by Sharlimar Designs


Remember to Save Often!!!


Let's create..


Open new image 750 x 600 flood fill with #dde0eb.

New layer select all open Im121010 (6) paper paste into selection. Apply mask.

Using Magic Wand click inside circle new layer paste your tube resize if needed, move below frame.

New layer flood fill #008000 Effects-Textured Effects-Moasic-Glass with these settings move below frame layer.

Open Lm121010 (10a) resize 32 percent place on left of layer. Duplicate, then using the same textured affect as above on original layer.

Open Lm121010 (9a) resize 28 percent place on left side above candles.

Open Lm121010 (3a) resize 32 percent move to left top corner , duplicate-Image-mirror.

Open Lm121010 (5) resize 23 percent place at bottom of frame.

Give all except your mask a light Drop Shadow.

Add your Artist © and your name then crop and save.

This is only a guide and feel free to use any other element you wish.

Most of all have fun creating.


If you wish to email me your creation, I then can show off your wonderful creations.

Thank you for using my tutorial.


Written by Maree (aka Falcon) on

Any similarities to this tutorial are purely coincidental

© Maree(aka Falcon)

Sunday, December 12, 2010

Frosty Christmas ♥


Supplies Needed

Tube I'm using is artwork of Elias Chatzoudis you can find it Here
Scrapkit by Mythical called Christmas Frosting FTU , you can find it Here
Font: Kingthings Christmas 2
Drop Shadow of choice.
Maskvix_434 and vix_3 by Vix Here
Remember to Save Often!!!


Let's create


Open new image 650 x 650.Flood fill with #ffffff.
New layer select all, open paper4 paste into selection,deselect then
apply mask 434, merge group.
New layer select all, open paper11 paste into selection
apply mask vix_3 merge group. Give a drop shadow.
Add your tube place on left of layer, give a light drop shadow.
Open Element 23 place left side, give a drop shadow
Open Element 1 resize 85 percent place on left side below church layer, see tag.
Open Element 15 reszie 45 percent move to top of mask, give a drop shadow.
Open Element 12 resize 50 percent place behind masks.

Add your Artist © and your name then crop and save.To animate please continue below.
This is only a guide and feel free to use any other element you wish.
Most of all have fun creating.

Animation
Open AS then click back into PSP.
Copy Special-copy merged paste into AS.
Back in PSP X-out sparkle layer, copy special-copy merged paste in AS after current frame.
Highlite both frames Ctrl+A then duplicate them twice.
Next click only on the first 2 frames then duplicate, you now should have 10 frames.
Animation-Frame Properties and change this to 25.
Play your animation if all okay then save as a gif.


If you wish to email me your creation, to show off your wonderful creations.
Thank you for using my tutorial.


This tutorial was written by Maree (aka Falcon) on 13 Decenber 2010
Any similarities to this tutorial are purely coincidental
© Maree

Santa's Helper ♥


Supplies Needed

Tube I'm using is the artwork of Al Rio, you find it at CILM
Scrapkit by Faba isFTU Merry XMas,you can find it Here.
Font:
Drop Shadow of choice.
UrbanFairy mask37 Here
Mask Wsl_84 by Weescotslass
Remember to Save Often!!!
Let's create
Open new image 650 x 650 floodfill with #FFFFFF.
New layer flood fill with black then apply mask.Then using Flaming Pear with these settings:


Open Faba_Minikit_XMas_El20 resize 65 percent move to left.
Open Faba_Minikit_XMas_El21 resize 28 percent Image-Flip, move to top of layer.
Open tube layer copy toy layer paste on righ side.
Open tube paste place on top of boxes.
Open Faba_Minikit_XMas_El19, resize 29 percent, Image-mirror place below box layer.
Open Faba_Minikit_XMas_El3, resize13 percent place bottom of tree.
Open Faba_Minikit_XMas_El16, resize 15 percent, Image-mirror place at bottom of tree.
Open Faba_Minikit_XMas_El12, resize 24 percent place left top of layer.
Open Faba_Minikit_XMas_El11, resize 12 percent place at top of mask.
Open Faba_Minikit_XMas_El15, resize 11 percent place at bottom tree.
Give all a Drop shadow of 2/2/50/5
New layer floodfill with #179002 apply wsl_84 mask.
Now apply Xfeno-Constellation with these setting.

Add your Artist © and your name then crop and save.
This is only a guide and feel free to use any other element you wish.
Most of all have fun creating.

If you wish to email me your creation, I then can show off your wonderful creations.
Thank you for using my tutorial.

Written by Maree (aka Falcon) on
Any similarities to this tutorial are purely coincidental
© Maree(aka Falcon)

Friday, December 3, 2010

Easy Christmas ♥


Supplies Needed
Tube I'm using is artwork of Judy Mastrangele you can find it Here  
Scrapkit by Beata2011 called Easy Christmas, you can find it Here.
Font: Giddyup Std
Drop Shadow of choice.
Maskvix_431 and vix_434 by Vix
Remember to Save Often!!!

Let's create

Open new image 650 x 650.Flood fill with #ffffff.
New layer select all, open paper5 paste into selection,deselect then 
apply mask 434, merge group.
New layer select all, open paper10 paste into selection
 apply mask vix_431 merge group. Give a drop shadow.
Add your tube place between the mask layers then give a light drop shadow. 
Open liski4 resize 9 percent mirror place left side, give a drop shadow
Open choinka resize 85 percent place on right side between masks, see tag.
Open napis1  move to right top of mask, give a drop shadow.
Open liski1 resize 9 percent place behind wordart,give a drop shadow.
Open bombka2 resize 25 percent place above wordart on left side.
Open misio2 resize 10 percent place in front of tree, give a drop shadow.
Open szyzki2 resize 7 percnet place above branch layer, give a drop shadow.
Open kokarda4 resize 42 percent place on left,give a drop shadow.
Open galazka2 resize 8 percent place near bear.
Open tube using selection tool copy berries place under branch duplicate 
place 2nd one near tree.
I used color  #1a5865 for name then used gradient glow white. 
Add your Artist © and your name then crop and save.
This is only a guide and feel free to use any other element you wish.
Most of all have fun creating.

If you wish to email me your creation, to show off your wonderful creations.
Thank you for using my tutorial.

This tutorial was written by Maree (aka Falcon) on 3 Decenber 2010
Any similarities to this tutorial are purely coincidental
© Maree

Thursday, December 2, 2010

A Holly Jolly Christmas 2 U.


Supplies Needed


Tube of choice, I'm using ©Leonardo Preda from MPT Here
Scrapkit by Prarie Sage,a part of the Holly Jolly Blog Train you can find it Here.
Font: Christmas Card 
Drop Shadow of choice.
Mask Becky_Mask016 by Becky Here
Remember to Save Often!!!

Let's begin

Open new image 650 x 650.
New layer using Rectangle tool draw out a medium size square.
Then using Christmas card font type the words Merry Christmas around the box.
Making sure spaced evenly, convert layer.
I used white#ffffff then added a Gradient Glow-red. Add Drop Shadow 2/2/50/5.
Next using theEllipse tool draw out a medium circle,convert to raster.
Using Magic Wand click inside circle, then copy green bauble Paste into selection.Repeat this 

time using the red bauble.
Open pointseatta swag resize by 35 percent duplicate place on top of baubles.
Open paper 2 then click inside square with Magic wand Paste paper into Selection - deselect.
Open gold tree paste left side of square.
Open gold loop bow resize 35 percent place at top of tree.
Open gold angel place right of tree.
Open tube copy paste as new layer and place at bottom of square, add drop shadow.
New layer select all open paper4 paste into selection, apply mask.

Add your Artist © and your name then crop and save.
This is only a guide and feel free to use any other element you wish.
Most of all have fun creating.
If you wish to email me your creation, I then can show off your wonderful creations.
Thank you for using my tutorial♥
This tutorial was written by Maree (aka Falcon) on 1st  December 2010
Any similarities to this tutorial are purely coincidental
© Maree