Monday, May 23, 2011

Goddess ♥


For this Tutorial you will need.

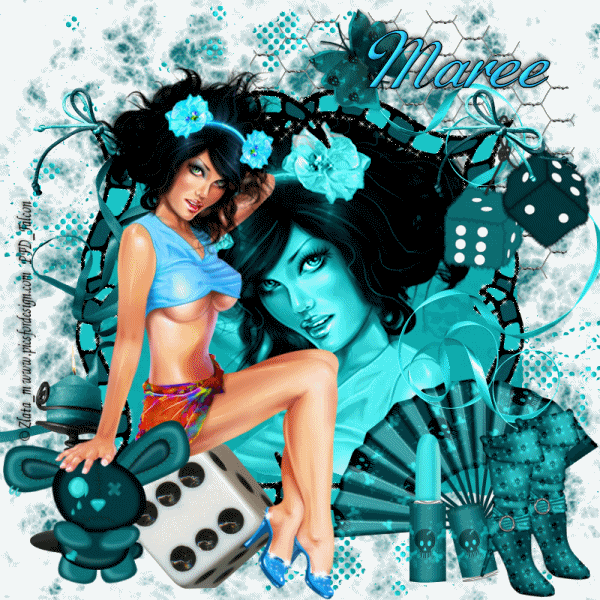
A Tube of your choice I am using the awesome artwork of ©Elias Chatzoudis,
which you must have a license to use you can get one at PTE

* Please note that I purchased my tube from MPT *

Elements and Papers are from a scrap kit called Green Goddess by
*Wishing On A Star* you can downland it Here.

Font: He Formed My Heart
Drop Shadow of choice.

Mask *Horseplay's Pasture*, it's #HPP-11 you can download it Here
Remember to Save Often!!!

Let's create

Open new image 650 x 650 transparent background.

Select WishingonaStarr_GreenGoddess_Frame paste as new layer.
Click inside with Magic Wand/selections/Modify/Expand by 6 paste WishingonaStarr_GreenGoddess_paper17 position
so light is at top of cirlce/Selections/Invert/Delete/move below frame.
Add your closeup tube now position hit Delete.
Move below frame/change Blend Mode to Luminance(L)/add a drop shadow.

Select WishingonaStarr_GreenGoddess_Arrangement paste position on left
add drop shadow.
Select WishingonaStarr_GreenGoddess_Bow resize 28% place on top of arrangement
add drop shadow.
Select WishingonaStarr_GreenGoddess_Asiatic lily resize 37% place at front of arrangement, add drop shadow.
Add your Main tube position on right of layer, add drop shadow.
Select WishingonaStarr_GreenGoddess_Caged bird resize 65% move to center
add drop shadow.
Select Preset tool/callout 04 width -4 draw out above bird cage, see tag.
I used #000000.
Type the word Goddess!! FG:00ff00 BG:000000 Stroke 1.Place inside callout shape.
Select WishingonaStarr_GreenGoddess_Paper14 paste as background layer/
apply mask/merge group..

Add your Artist © and your name then crop and save.
This is only a guide and feel free to use any other element you wish.
Most of all have fun creating.


If you wish to show off your creations.Email me your creation and I will place it
on my show off Page. Thank you for using my tutorial.


Written and copyrighted to Maree (aka Falcon) on 2011.
Under no uncertain terms are you allowed to make money from anything
produced from this tut, this is against my TOU's.

Any similarities to this tutorial are purely coincidental.

Undress Or Dress Me Up ♥


For this Tutorial you will need.

A Tube of your choice I am using the awesome artwork of © Ted hammond ,
which you must have a license to use you can get one at CDO

Elements and Papers are from a scrap kit called Dress Me Up(Old PTU Now FTU) by *Cinnamon Scraps* you can downland it Here.
Font:
Drop Shadow of choice.
Mask *HorsePlay's Pasture*, it's #11 & 16 you can download it Here
Remember to Save Often!!!

Let's create

Open new image 650 x 650 transparent background.

Select CS_dressmeup_frame3/click iside with Magic wand/
selections/Modify/Expand by 5.
Open CS_dressmeup_paper3 paste as new layer/Selections/Invert/
Delete/move below frame layer.
On paper layer Effects/Textures/Mosaci weave with these settings:

Add a drop shadow to frame layer.

Add your tube now add drop shadow to it.

Select CS_dressmeup_dress1 paste move to right of frame/
add drop shadow.
Select CS_dressmeup_corset1 paste move to left of frame/
add drop shadow.
Select CS_dressmeup_flower 1/2/3 resize all to 38%/see tag for placement/
add drop shadow.
Select CS_dressmeup_brad1 an 2 paste resize both 32% position on top of flower/see tag.
Add drop shadow.
Select CS_dressmeup_hangingcharm2 resize 30% move to top left of frame/
add drop shadow.
Select CS_dressmeup_littleflower1 resize 15% mplace on top of charm
/add drop shadow.
Select CS_dressmeup_lipstick1 resize 16% then position at bottom of frame.
Select CS_dressmeup_shoes1 resize 19%/use your Pick Tool-angle to the right
add drop shadow.
Select CS_dressmeup_beadedheart paste below paper layer/
duplicate/Image/Mirror/Flip.

New layer select all copy paste into selection CS_dressmeup_paper9/
apply mask 16/merge group.
New layer select all paste into selection CS_dressmeup_paper12/
apply mask 11/merge group.
Add your Artist © and your name then crop and save.

This is only a guide and feel free to use any other element you wish.
Most of all have fun creating.


If you wish to show off your creations.Email me your creation and I will place it
on my show off Page. Thank you for using my tutorial.


Written and copyrighted to Maree (aka Falcon) on 23rd May 2011.
Under no uncertain terms are you allowed to make money from
anything produced from this tut, this is against my TOU's.

Any similarities to this tutorial are purely coincidental.

Spring Is Here ♥


For this Tutorial you will need.

A Tube of your choice I am using the awesome artwork of © Suzanne Woolcott ,
which you must have a license to use you can get one at GorjussArt

Elements and Papers are from a scrap kit called Freshness of Spring by
Melissa *P & A Designs*you can download it Here.

Font: HaloHandletter
Drop Shadow of choice.

Remember to Save Often!!!

Let's create

Open new imag700x700.
Open Paper8/open Material palette find it in Pattern-select.
Click on PresetTool-rounded rectangle-width 45 draw out frame to it layer.
Give a drop shadow using Lokas 3D shadow-30.

Click inside with Magic wand/selections/Modify/Expand by 4/open paper13
paste as new layer.
Selections/Invert/Delete/move below frame layer.
Open scatter3 paste above paper layer.

Open Flourish1 paste above scatter add a drop shadow.
Add your tube give a drop shadow.

Open Flower 3 reize 65% paste move to left of frame,
add drop shadow.
Open vine1 place on side of frame/duplicate/Image/Mirror,
add drop shadow.
Open Flowere1 resize 43% place on top of vine, see tag for placement,
add drop shadow.
Open Butterfly3 resize38% position on vine left side,
add drop shadow.
Open Label3 resize 34% position on top of frame.
add drop shadow.
Open Flower2 resize 23% position bottom right of frame,
add drop shadow.
I also add the geese that came with my tube position them at bottom of frame,
add drop shadow.
I used #f89999 color with a Gradient Glow-white for the wordart "Spring is Here",
add a drop shadow of 2/2/40/8.

Add your Artist © and your name then crop and save.
This is only a guide and feel free to use any other element you wish.
Most of all have fun creating.


If you wish to show off your creations.Email me your creation and I will place it
on my show off Page. Thank you for using my tutorial.


Written and copyrighted to Maree (aka Falcon) on 23rd May 2011.
Under no uncertain terms are you allowed to make money from anything produced from this tut,

this is against my TOU's.
Any similarities to this tutorial are purely coincidental.

Wednesday, May 18, 2011

My Girl My Princess ♥


For this Tutorial you will need.

Elements and Papers are from a scrap kit called My Dear Daughter-FTU by *Peek A Boo Designs* you can find it Here.
Font: AL Amusement
Drop Shadow of choice.
Mask*HorsePlays Pastures*, it's #14 you can download it Here
Remember to Save Often!!!

Let's create

Open new image 650 x 650.
Select your Preset Tools draw out a rectangle (width 10) not to large, FG:ff80ff
Close out BG:,click inside with Magic wand select PABD_mydeardaughter_paper_03
paste as new layer/selections/Invert/Delete/move below.
Right click Merge down.
Select Magic Wand click on outer frame then apply these settings:


Duplicate layer, move down see tag for placement.
Create a star with your Preset tool repeat above this time using PABD_mydeardaughter_paper_02.
Select PABD_mydeardaughter_swirl i paste above oblong shapes layer resize 35%,
add drop shadow then duplicate move below oblong shape layer.

Select PABD_mydeardaughter_bow2 resize 18%/Image/FreeRotate90 left/
place at top of star then

using your Freehand selection tool erase part of ribbon in front/add drop shadow.
Select PABD_mydeardaughter_heart_02 resize 25% move about till your happy with placement, add drop shadow.
Select PABD_mydeardaughter_flower_02 resize 18% move to lower right of layer
, add drop shadow.
Select PABD_mydeardaughter_umbrella_01 resize 21% move to right of layer,
add drop shadow.
Select PABD_mydeardaughter_girl_01 resize 65% move to center of layer,
add drop shadow.
Select PABD_mydeardaughter_flower_03 resize 14% move to center left of layer,
add drop shadow.
Select PABD_mydeardaughter_button_05 resize 15% move to top left of layer,
add drop shadow.
Select PABD_mydeardaughter_wordart_03 resize 35%paste above background layer/Adjust/Hue and Saturation/Colorize H-255/S-255,
add drop shadow.
Select PABD_mydeardaughter_paper_01/apply mask/merge group.

Add your Artist © and your name then crop and save as png.
This is only a guide and feel free to use any other element you wish.
Most of all have fun creating.


If you wish to show off your creations.Email me your creation and I will place it
on my show off Page. Thank you for using my tutorial.


Written and copyrighted to Maree (aka Falcon) on 18th May 2011.
Under no uncertain terms are you allowed to make money from anything
produced from this tut,

this is against my TOU's.
Any similarities to this tutorial are purely coincidental.

Sunday, May 1, 2011

Girlz Only ♥


For this Tutorial you will need.

A Tube of your choice I am using the awesome artwork of © Zlata_M ,
which you must have a license to use you can get one at PFD

Elements and Papers are from a scrap kit called Girlz by Bea *Bea's Creations*
you can find it Here. Please leave some love!!
Font:
Drop Shadow of choice.
Mask by *Dee's Designs Depot*, it's #13 you can download it Here
Remember to Save Often!!!

Let's create

Open new image 700 x 700 fill with #ffffff.
Select frame02_bc_girlz_freebie, click inside frame with Magic Wand/
Selections/Modify/Expand by 10/ paste p05_bc_girlz_freebie
Selections/Invert/delete move below frame layer.
Paste your closeup tube in frame/position/hit delete/
move below frame/De-select.
Apply blend mode Luminace(Legacy).

Select fan01_bc_girlz_freebie place on right of layer resize 45%.
Select ribbon02_bc_girlz_freebie move to right of layer.
Select dice01_bc_girlz_freebie, move to top right of frame

Select lipstick01_bc_girlz_freebie move to lower right of layer reisze 36%.
Select ribbon01_bc_girlz_freebie move to left of frame.
Select candle01_bc_girlz_freebie move to left of frame, resize 42%.

Select butterfly01_bc_girlz_freebie, place above frame right side resize 24%.
Selectbow03_bc_girlz_freebie, place to left corner of frame,duplicate place
on frame corner right side.
Select boot01_bc_girlz_freebie,Image/Mirror/move to lower right of frame/
duplicate move down slightly/see tag.

Select deco09_bc_girlz_freebie,place on left of frame/resize 20%.
Select bunny02_bc_girlz_freebie,resize 65% move to left of dice.
Add your main tube place on top of dice.

On bunny layer using selection tool select right side of bunny head/
right click and Promote Selection to Layer.
Carefully using your Eraser tool on duplicated layer to show all hand.

Select wire01_bc_girlz_freebie paste above background layer.
Select deco01_bc_girlz_freebie move to top left of layer/duplicate/Image/Flip/Mirror
New layer above background,select allpaste into selection
p10_bc_girlz_freebie/apply mask/merge group.

Give all layer a Drop Shadow of choice.


Add your Artist © and your name then crop and save.
If you wish to Animate please continue.
This is only a guide and feel free to use any other element you wish.
Most of all have fun creating.

Now to Animate.
On your frame layer duplicate it twice, rename 1,2,3.
Click on layer 1 then Effects-Xenofex 2 Constellation with these settings:
Apply this to layer 2 click the random seed then ok, repeat again for 3.

Open AS back in Psp X-out frame layers 2/3.Edit/Copy Special/Copy Merged.
In AS paste as new animation.
Click into Psp X-out 1 open 2 make sure you have it highlighted,
then repeat above this time pasteing after Current frame.
Repeat for Frame 3 layer.
Check your animation then save as a Gif.
Email me your creation, so I can show off your creations on my blog.
Thank you for using my tutorial.


Written and copyrighted to Maree (aka Falcon) on 1st May 2011.

Under no uncertain terms are you allowed to make money from anything
produced from this tut, this is against my TOU's.
Any similarities to this tutorial are purely coincidental.