Monday, December 27, 2010

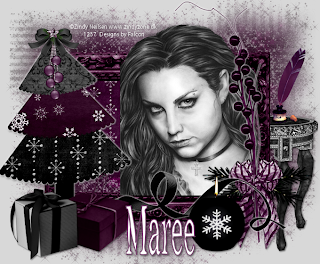
A Not So Merry Xmas ☻


Supplies Needed

Tube I'm using the artwork of Zindy Neilson, you find it Here.
Scrapkit by Designs by Vaybs FTU is Dark Christmas 2010 ,
you can find it Here.
Font: Chilly Moe
Drop Shadow of choice.
Mask wsl_81 by Weescotslass
Remember to Save Often!!!

Let's create

Open new image 680 x 600.
New layer Select all open DBV-DarkXmasPaper 1 paste into selection,apply mask.
Open DBV_DarkXmasFrame 3,click inside frame with Magic Wand-
Selections-modify-expand by 4.
New layer paste DBV_BlackXmasPaper 11 into selection.
Selections-Invert-Delete, move below frame layer.
Add your tube adjust to fit frame.
Open DBV_BlackXmasElement 23 resize 75 percent Image-Mirroe
move to bottom of frame.
Open DBV_BlackXmasElement 46 resize 75 percent place on left of frame.
Open DBV_BlackXmasElement 4 paste below frame layer on right side of frame.
Open DBV_BlackXmasElement 41 resize 75 percent place on table.
OPen DBV_BlackXmasElement 34 resize 43 percent place ontop of tree.
Open DBV_BlackXmasElement 17 resize 85 percent Image -Mirror-
place on right side of frame.
Open DBV_BlackXmasElement 18 rresize 53 percent
place on right bottom corner, see tag.
Open DBV_BlackXmasElement 25 resize 40 percent
place on bottom of frame.
Open DBV_BlackXmasElements 11 & 39 place at bottom of tree.
Select Elements 23 & 46 and apply EyeCandy 5 Impact-
Gradient Glow with these settings:


Give all a Drop Shadow 2/2/50/5.

Add your Artist © and your name then crop and save.
This is only a guide and feel free to use any other element you wish.
Most of all have fun creating.

If you wish to email me your creation, I then can show off your wonderful creations.
Thank you for using my tutorial.

Written by Maree (aka Falcon) on 28 December 2011
Any similarities to this tutorial are purely coincidental
© Maree(aka Falcon)

Happy New Year 2011 ♥


Supplies Needed


Tube I'm using the artwork of Elias Chatzoudis, you find Here
Scrap kit by Laurie Made Me Scraps --Happy New Year FTU
you can find it Here.
Font: Jellyka Wester Prim
Drop Shadow of choice.
Mask vix_ mask332 by Vix
Monti's Blinds 1 Mask Here
Fireworks Here
Remember to Save Often!!!

Let's create

Open new image 700 x 700 flood fill with #ffffff.
new layer select all Irhappynyp4 paste into selection, deselect. Apply Vix-mask-merge group.
New layer select all Irhappynyp 2 paste into selection, deselect.
Apply Monti-mask, merge group.Duplicate.
Copy paste yur tube resize if needed, center tube.
Open IrhappynyEle's 66,67 and 71 place around your tube.
Open IrhappynyEle 7 pastemove to lower right side of layer
Open IrhappynyEle 53 paste in center of Ele 7
Open IrhappynyEle 38 move to middle of Ele 53 with Diamond in center of 0.
Open IrhappynyEle 57 place right side of tube.
Open IrhappynyEle 62 and 32 paste then place 32 in center of 62 bottom of tube.
Open IrhappynyEle 50 resize 75 percent place on left of tube.
Open IrhappynyEle 43 paste place on right side see tag.
Open IrhappynyEle 52 paste resize 65 percent move to left of tube,
Open IrhappynyEle 51 paste resize 60 percent, move to left of glass.
Open IrhappynyEle 17 paste move to bottom left.
Open IrhappynyEle 37 paste move to top of layer.
Using your Pick Tool + Crtl grab the top corner box
then angle it toward the middle,see below.

Give all a Drop Shadow
Add your Artist © and your name then crop and save.
If you want to Animate please continue.

This is only a guide and feel free to use any other element you wish.
Most of all have fun creating.

Animation
Open AS.
X-out all except Background,the mask layers,Ele 66,67,71,37 and ©.
Edit Copy Special-Copy Merged, click into AS paste as new animation.
Ctrl+L duplicate 11 times.
Back in Psp close out those layers and open all other layers.
In AS open animation I used set 3 & 5 Ctrl+A to select all copy and
paste them around the layer.
Play your animation to check all is ok.
Back in Psp Edit Copy special-Copy Merged paste as new Animation in AS.
Edit-Copy then paste Into Selected Frame,
play with it till you are happy with placement.
Resize and save as a Gif.

If you wish to email me your creation, I then can show off your wonderful creations.
Thank you for using my tutorial.

Written by Maree (aka Falcon) on 28 December 2010
Any similarities to this tutorial are purely coincidental
© Maree(aka Falcon)

Thursday, December 23, 2010

From Me 2 You ♥


Supplies Needed


Scrapkit by Shell Scraps, FTU called MerryChristmasPU ,
you can find it Here.
Font: of Choice
Drop Shadow of choice.
Mask_sdtMask04 by Sharlimar Designs
Mask wsl_84 by Weescotslass
Snow Here

Remember to Save Often!!!!

Let's create

Open new image 650 x 650.
New layer selelct all, open paper 1 paste into selection.
Apply mask04-merge grup.
Click inside frame with Magic Wand -Selections-Modify-Expand by 4.
Open Santa's house resize if needed then copy- paste on new layer, deselect.
Open Tree 1 resize 45 percent move to left of frame.
Open snowman 1 resize 75 percent place in lower-center of layer, see tag.
Open Sign 1 resize 45 percent place right side of layer.
Open Bow 1 resize 35 percent place at top of frame.
Open Paper 7 paste above background layer, apply mask 84, Merge group.

Add your Artist © and your name then crop and save.
This is only a guide and feel free to use any other element you wish.
Most of all have fun creating.

If you wish to email me your creation, I then can show off
your wonderful creations.
Thank you for using my tutorial.
Written by Maree (aka Falcon) on 23 December 2010
Any similarities to this tutorial are purely coincidental
© Maree(aka Falcon)
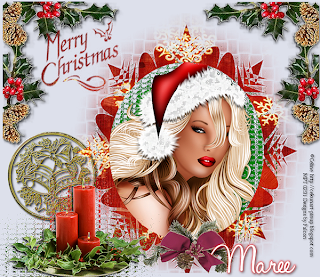
Season Blessings ♥


Supplies Needed


Tube I'm the artwork by Celine , you find it Here

Scrapkit byScrappiness Downunder FTU called LM121010 ,you can find it Here.

Font: HaloHandletter

Drop Shadow of choice.

Mask sdtMaskXMas18 by Sharlimar Designs


Remember to Save Often!!!


Let's create..


Open new image 750 x 600 flood fill with #dde0eb.

New layer select all open Im121010 (6) paper paste into selection. Apply mask.

Using Magic Wand click inside circle new layer paste your tube resize if needed, move below frame.

New layer flood fill #008000 Effects-Textured Effects-Moasic-Glass with these settings move below frame layer.

Open Lm121010 (10a) resize 32 percent place on left of layer. Duplicate, then using the same textured affect as above on original layer.

Open Lm121010 (9a) resize 28 percent place on left side above candles.

Open Lm121010 (3a) resize 32 percent move to left top corner , duplicate-Image-mirror.

Open Lm121010 (5) resize 23 percent place at bottom of frame.

Give all except your mask a light Drop Shadow.

Add your Artist © and your name then crop and save.

This is only a guide and feel free to use any other element you wish.

Most of all have fun creating.


If you wish to email me your creation, I then can show off your wonderful creations.

Thank you for using my tutorial.


Written by Maree (aka Falcon) on

Any similarities to this tutorial are purely coincidental

© Maree(aka Falcon)

Sunday, December 12, 2010

Frosty Christmas ♥


Supplies Needed

Tube I'm using is artwork of Elias Chatzoudis you can find it Here
Scrapkit by Mythical called Christmas Frosting FTU , you can find it Here
Font: Kingthings Christmas 2
Drop Shadow of choice.
Maskvix_434 and vix_3 by Vix Here
Remember to Save Often!!!


Let's create


Open new image 650 x 650.Flood fill with #ffffff.
New layer select all, open paper4 paste into selection,deselect then
apply mask 434, merge group.
New layer select all, open paper11 paste into selection
apply mask vix_3 merge group. Give a drop shadow.
Add your tube place on left of layer, give a light drop shadow.
Open Element 23 place left side, give a drop shadow
Open Element 1 resize 85 percent place on left side below church layer, see tag.
Open Element 15 reszie 45 percent move to top of mask, give a drop shadow.
Open Element 12 resize 50 percent place behind masks.

Add your Artist © and your name then crop and save.To animate please continue below.
This is only a guide and feel free to use any other element you wish.
Most of all have fun creating.

Animation
Open AS then click back into PSP.
Copy Special-copy merged paste into AS.
Back in PSP X-out sparkle layer, copy special-copy merged paste in AS after current frame.
Highlite both frames Ctrl+A then duplicate them twice.
Next click only on the first 2 frames then duplicate, you now should have 10 frames.
Animation-Frame Properties and change this to 25.
Play your animation if all okay then save as a gif.


If you wish to email me your creation, to show off your wonderful creations.
Thank you for using my tutorial.


This tutorial was written by Maree (aka Falcon) on 13 Decenber 2010
Any similarities to this tutorial are purely coincidental
© Maree

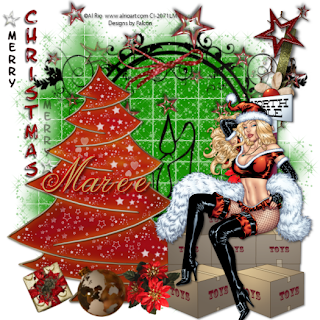
Santa's Helper ♥


Supplies Needed

Tube I'm using is the artwork of Al Rio, you find it at CILM
Scrapkit by Faba isFTU Merry XMas,you can find it Here.
Font:
Drop Shadow of choice.
UrbanFairy mask37 Here
Mask Wsl_84 by Weescotslass
Remember to Save Often!!!
Let's create
Open new image 650 x 650 floodfill with #FFFFFF.
New layer flood fill with black then apply mask.Then using Flaming Pear with these settings:


Open Faba_Minikit_XMas_El20 resize 65 percent move to left.
Open Faba_Minikit_XMas_El21 resize 28 percent Image-Flip, move to top of layer.
Open tube layer copy toy layer paste on righ side.
Open tube paste place on top of boxes.
Open Faba_Minikit_XMas_El19, resize 29 percent, Image-mirror place below box layer.
Open Faba_Minikit_XMas_El3, resize13 percent place bottom of tree.
Open Faba_Minikit_XMas_El16, resize 15 percent, Image-mirror place at bottom of tree.
Open Faba_Minikit_XMas_El12, resize 24 percent place left top of layer.
Open Faba_Minikit_XMas_El11, resize 12 percent place at top of mask.
Open Faba_Minikit_XMas_El15, resize 11 percent place at bottom tree.
Give all a Drop shadow of 2/2/50/5
New layer floodfill with #179002 apply wsl_84 mask.
Now apply Xfeno-Constellation with these setting.

Add your Artist © and your name then crop and save.
This is only a guide and feel free to use any other element you wish.
Most of all have fun creating.

If you wish to email me your creation, I then can show off your wonderful creations.
Thank you for using my tutorial.

Written by Maree (aka Falcon) on
Any similarities to this tutorial are purely coincidental
© Maree(aka Falcon)
Friday, December 3, 2010

Easy Christmas ♥


Supplies Needed
Tube I'm using is artwork of Judy Mastrangele you can find it Here  
Scrapkit by Beata2011 called Easy Christmas, you can find it Here.
Font: Giddyup Std
Drop Shadow of choice.
Maskvix_431 and vix_434 by Vix
Remember to Save Often!!!

Let's create

Open new image 650 x 650.Flood fill with #ffffff.
New layer select all, open paper5 paste into selection,deselect then 
apply mask 434, merge group.
New layer select all, open paper10 paste into selection
 apply mask vix_431 merge group. Give a drop shadow.
Add your tube place between the mask layers then give a light drop shadow. 
Open liski4 resize 9 percent mirror place left side, give a drop shadow
Open choinka resize 85 percent place on right side between masks, see tag.
Open napis1  move to right top of mask, give a drop shadow.
Open liski1 resize 9 percent place behind wordart,give a drop shadow.
Open bombka2 resize 25 percent place above wordart on left side.
Open misio2 resize 10 percent place in front of tree, give a drop shadow.
Open szyzki2 resize 7 percnet place above branch layer, give a drop shadow.
Open kokarda4 resize 42 percent place on left,give a drop shadow.
Open galazka2 resize 8 percent place near bear.
Open tube using selection tool copy berries place under branch duplicate 
place 2nd one near tree.
I used color  #1a5865 for name then used gradient glow white. 
Add your Artist © and your name then crop and save.
This is only a guide and feel free to use any other element you wish.
Most of all have fun creating.

If you wish to email me your creation, to show off your wonderful creations.
Thank you for using my tutorial.

This tutorial was written by Maree (aka Falcon) on 3 Decenber 2010
Any similarities to this tutorial are purely coincidental
© Maree

Thursday, December 2, 2010

A Holly Jolly Christmas 2 U.


Supplies Needed


Tube of choice, I'm using ©Leonardo Preda from MPT Here
Scrapkit by Prarie Sage,a part of the Holly Jolly Blog Train you can find it Here.
Font: Christmas Card 
Drop Shadow of choice.
Mask Becky_Mask016 by Becky Here
Remember to Save Often!!!

Let's begin

Open new image 650 x 650.
New layer using Rectangle tool draw out a medium size square.
Then using Christmas card font type the words Merry Christmas around the box.
Making sure spaced evenly, convert layer.
I used white#ffffff then added a Gradient Glow-red. Add Drop Shadow 2/2/50/5.
Next using theEllipse tool draw out a medium circle,convert to raster.
Using Magic Wand click inside circle, then copy green bauble Paste into selection.Repeat this 

time using the red bauble.
Open pointseatta swag resize by 35 percent duplicate place on top of baubles.
Open paper 2 then click inside square with Magic wand Paste paper into Selection - deselect.
Open gold tree paste left side of square.
Open gold loop bow resize 35 percent place at top of tree.
Open gold angel place right of tree.
Open tube copy paste as new layer and place at bottom of square, add drop shadow.
New layer select all open paper4 paste into selection, apply mask.

Add your Artist © and your name then crop and save.
This is only a guide and feel free to use any other element you wish.
Most of all have fun creating.
If you wish to email me your creation, I then can show off your wonderful creations.
Thank you for using my tutorial♥
This tutorial was written by Maree (aka Falcon) on 1st  December 2010
Any similarities to this tutorial are purely coincidental
© Maree

Thursday, November 18, 2010

Falling For You ♥

Supplies Needed
Tube or Image of choice, I am using the fantastc artwork of Suzanne Woolcott   
 you can find  the artwork here 
Scrap kit I am using a great kit called Falling For You Sampler by Designs by Stina,
you can find it here.
Font: Clipz Stardust 
Drop Shadow of choice.
Mask wsl_84 by Weescotslass
Remember to Save Often!!!

Let's begin

Open new image 600 x 600.
New layer Selections-select all then open DSB_paper 11, paste into selection-select none.
Apply mask then merge group.
Open DSB_frame06 copy paste resize 75 percent, click inside frame with magic wand
 then select  DSB_paper16, copy paste Invert-delete, move below frame.
Add your tube/s now move below frame.
Open DBS_leaves02 copy paste above mask layer, duplicate-Image Flip-Mirror.
Open DBS_HeatScatter01 copy paste duplicate, Image Flip-Miror
Open DBS_Heat copy paste resize 32 percent place top left frame, see tag.
Open DBS_GlitterButerfly03 copy paste resize 28 percent place lower right side.
Give all a light Drop Shadow 1/1/50/5.

Add your Artist © and your name then crop and save.
This is only a guide and feel free to use any other element you wish.
Most of all have fun creating.

This tutorial was written by Maree (aka Falcon) on 19 November 2010
Any similarities to this tutorial are purely coincidental.
© Maree

Monday, October 18, 2010

Halloween Havoc ♥


Supplies Needed
Tube or Image of choice, I am using the fantastc artwork of Elias Chatzoudis
you can find his artwork here at MPT

Scrap kit I am using a FTU kit called Halloween Havoc by Jen of Sleek & Sassy,
you can find it here.
Font: Burton's Nightmare
Drop Shadow of choice.
Eye Candy-Impact-Backlight
Xfeno 2 -lightening
Mura's Meister -Clouds

Remember to Save Often!!!

Let's begin

Open new image 650 x 650.
New layer flood fill with #000000, then apply Mura Meisters clouds with these settings:


Select button 2 copy paste resize 85 percent, then apply Impact-Backlight settings
Select your colors, choice is your own.
Select castle#1 copy paste resize 79 percent center in front of button.
Add your tube place at bottom of layer resize if needed.

Selec tCat_On_Pumpkin copy paste Image-Mirror resize 39 percent
 place right bottom side of layer, see tag.
Select Kitty copy paste Image-Mirror resize 29 percent
 place on tube bottom, see tag.
Select Witch_Sign copy paste resize 37 percent place
on bottom left of layer.
Select cm_wp-sticker5 copy paste resize 46 percent place
 near top of button so that the Ghouls eyes can been see, see tag.
Apply Xfeno-Lightening with these setting:
I applied mine on the artist © then repeated it again in different position.
Have fun and tryplacing it around your tag

Add your Artist © and your name then crop and save.
This is only a guide and feel free to use any other element you wish.
Most of all have fun creating.

This tutorial was written by Maree (aka Falcon) on 18 October 2010
Any similarities to this tutorial are purely coincidental

Friday, October 15, 2010

Witching Hour ♥


Supplies Needed
Tube or Image of choice, I am using the fantasitc artwork of Elias Chatzoudis
you can purchase his artwork at MPT
Scrap kit of choice, I am using a great kit called Witching Hour by Digicats,
FTU you can find it here
Font:
Drop Shadow of choice.
Mask_001 by Becky
Xfeno 2 -Electify
Remember to Save Often!!!

Let's begin

Open new image 650 x 650.
Select DCD_WiHo_Frame02 copy paste resize 75 percent.Click inside with Magic Wand.
Selections-Modify-Expand by 4 copy paste DCD_paper16 resize by 80 percent.
Selections-Invert-hit Delete, move below frame layer.Lower the Opacity to 77.
Copy paste your tube resize if needed.
Select DCD_WiHo_Cauldron02 copy paste resize by 65 percent and move to left of tube.
Select DCD_WiHo_Crab Grass02 copy paste resize by 75 percent
duplicate move around behind your tube, see tag.
Select DCD_WiHo_Cat03 copy paste Image-Miror resize 65 percent
move him so he is touching the leg of tube.
New layer Select All copy DCD_WiHo_paper19 paste into Selection-deseclet.
Select DCD_WiHo_Spellbook03 center the tube.Effects -xfeno 2 - Electify with these settings:
click to enlarge
Give a Drop Shadowto all except mask layer. I used 1/1/50/6.

Add your Artist © and your name then crop and save.
This is only a guide and feel free to use any other element you wish.
Most of all have fun creating.

This tutorial was written by Maree (aka Falcon) on
Any similarities to this tutorial are purely coincidental

Let's Celebrate


Supplies Needed
Tube or Image of choice, I am using the fantastc artwork of Elias Chatzoudis
you can find his artwork here MPT

Scrap kit is called Let's Celebrate b yLise-Lotte Sunesen,
you can find it here.
This kit is a Limited FTU to the30 October 2010 then its PTU.
So be quick and get it soon.
Font: Segoe Script
Drop Shadow of choice.
Mask_84 by Weescotslass

Remember to Save Often!!!

Let's begin

Open new image 650 x 600.

Select Ihsframe_kitLetsCelebrate_02 copy paste resize by 23 percent then
Image Free Rotate 90 left.

Click inside frame with Magic Wand -selections-Modify-Expand by 5 copy paste
 Ihspaper_kit_LetsCelebrate_8_green, resize by 70 percent.
Selections-Invert-hit Delete, move below frame.
Copy and paste your tube below frame layer resize as needed then I mirrored my image..
Select IhsClematis_kitLesCelebrate_01 copy paste resize 15 percent move
below frame layer to right side of frame.
Select IhsCar_kitLesCelebrate_02 copy paste resize 16 percent place
bottom left corner of frame.
Select IhsBow_kitLesCelebrate_02 copy paste resize 18 percent place top of frame.
Select IhsBalonDog_kitLesCelebrate_01 copy paste resize by 14 percent
place at bottom of frame.
Select IhsTeddyBear_kitLesCelebrate_01 copy paste resize 20 percent
 Image-Mirror place right lower corner of frame.
Select IhsCupCake_kitLesCelebrate_05 copy paste resize 12 percent
 place on bears paw, see tag.
Select IhsWordArt_kitLesCelebrate_01 copy paste resize 18 percent place at top of frame.
Select IhsBalloons_kitLesCelebrate_01 copy paste resize 12 percent
 place on left side of wordart.
New layer Select All copy Select IhsSolidPaper_kitLesCelebrate_Pink
paste into selection, deselect.
Apply mask Image Resize by 115 percent then Duplicate layer.Click on orignal layer
Adjust-Blur-Gaussian Blur - Radius 20.

Add a Drop Shadow I used 2/2/50/5.
Add your Artist © and your name then crop and save.
This is only a guide and feel free to use any other element you wish.
Most of all have fun creating.

This tutorial was written by Maree (aka Falcon) on 16 October 2010
Any similarities to this tutorial are purely coincidental


Monday, October 11, 2010

A Spooky Halloween ♥


Supplies Needed

Tube or Image of choice, I am using the artwork of Michael Calandra
 you can purchase from here MPT
Scrap kit I am using is Ghoul Eve by Randy Sin ,
you can find it here
Font:of Choice
Drop Shadow of choice.
Mask_0905 by Vix
Remember to Save Often!!!

Let's begin
Open new image 600 x 600.Fill layer with #808080
New layer select all copy paste bg2 into selection-deselect then
apply mask merge group.
Select rs_cornerweb2 copy paste resize 75 percent.
Select rs-deadtree-halloween2 copy paste resize 20 percent
 then move it up so top of tree showing above mask layer.
Select rs_ghostie 1 n 6 copy paste resize if needed move them so that
there is one on both sides of mask, see tag.
Add your tube copy paste resize if needed.
Select rs_wa7 copy paste resize 15 percent place above bat, see tag.
Give all except web layer a Drop Shadow.

Add your Artist © and your name then crop and save.
This is only a guide feel  free to use any other element you wish.
Most of all have fun creating.

This tutorial was written by Maree (aka Falcon) on
Any similarities to this tutorial are purely coincidental

Saturday, October 2, 2010

Beach Mornings ♥


Supplies Needed
Tube I am using the beautiful artwork of Monte Moore you can find the artwork at CILM.
Scrap kit I am using a great kit called Beach Mornings FTU by Artmama ,you can find it here
Font: of choice
Drop Shadow of choice.
Mask_41 by ButterflyFlutter
Remember to Save Often!!!

Let's begin

Open new image750 x 550.
Select Artmama-BeachMornings embellie 17 copy paste resize 95 percent.
Select Magic Wand holding down Crtl click inside each frame,
copy paste Artmama-beachMorings 08 Selections-Invert-hit delete
move below frame.
Select Artmame-BeachMornings embellie 08, 09, 10 copy paste below frame layer
move them around till you are happy with them.
Give a Drop Shadow to frame and embellie's.
X-out your background layer then Merge Visible.
Copy and paste your tube I placed mine just off center
Select Artmama-BeachMornings embellie 57 copy paste see tag for placement.
Select Artmama-BeachMornings embellie 31 copy paste place on left bottom corner of frame.
Give this a Drop Shadow then Duplicate-Image Mirror.
New layer Selections select all copy paste into selections Artmama-BeachMornings 02
Apply mask duplicate and move slightly down see tag.
Add a Drop Shadow to layers.

Add your Artist © and your name then crop and save.
This is only a guide and feel free to use any other element you wish.
Most of all have fun creating.

This tutorial was written by Maree (aka Falcon) on
Any similarities to this tutorial are purely coincidental

I'm a Survivor BCA ♥

Supplies Needed
Tube I am using the fantastic artwork of Ann Marine you can find her artwork at CILM
Scrap kit  I am using a great kit called Breat Cancer Awareness FTU  by Rieka Rafita
you can find it here.
Font: of choice
Drop Shadow of choice.
Remember to Save Often!!!

Let's begin

Open new image 600 x 600.
Select RR_Frame 3 copy paste, click inside with magic wand
 Selections-Modify_Expand-by 4.
Copy paste RR_paper6 Selections-Invert-hit Delete, move below frame.
Add your tube and resize if needed, move below frame.Deselect Ctrl+D.
Select RR_Wordart 1 copy paste place on left side frame center resize 50 percent.
Select RR_Butterfly2 copy paste resize 45 percent place on either side of wordart.
Select RR_AlphaHeart copy paste resize 36 percent place on right side of frame at top,
Select RR_Bow 3 copy paste resize 32 percent place on top of AlphaHearts.
Select RR_Candle copy paste move to bottom of frame then resize 39 percent.
Select RR_Flower3 copy paste resize 65 percent move in front of candle, see tag.
New layer select all copy paste into selection RR_paper9, deselect apply Mask, merge group.
Give all a Drop Shadow  2/2/50/6.

Add your Artist © and your name then crop and save.
This is only a guide and feel free to use any other element you wish.
Most of all have fun creating.

This tutorial was written by Maree (aka Falcon) on 2 October 2010.
Any similarities to this tutorial are purely coincidental.

My Purple Passion ♥

Supplies Needed

Tube I am using the fantastic artwork of Jennifer Jasenko
you can find her artwork at CILM
Scrap kit I am using a great kit called DSI Mini FTU by Dream Scape Imaging 
,you can find it here.
Font:of Choice
Drop Shadow of choice.
Remember to Save Often!!!

Let's begin
Open new image 650 x 650.
Select paper8_DSImk01Schnegge copy paste then apply mask
, merge group.Give this a Drop Shadow 2/2/50/5.
Select frame3_DSImk01Schnegge cop paste resize 75 percent Image-FreeRotate 90 left.
Using Magic Wand click inside frame Selections Modify Expand by 4 copy paste paper03_DSImk01Schnegge Selections-Invert-hit Delete, move below frame.

Select your tube copy paste duplicate position tube X-out duplicated layer
then hit Delete,move this layer below frame.
Open the duplicated layer using the Selection tool draw out a square around the head area of tube
then right click and select Promote Selection to layer.
Now using your Eraser clean up around the bottom of tube to give the appearance
she is leaning over the frame, see tag.
Select frame02 copy paste resize 38 percent place on right side of frame.
Select flower05_DSImk01Schnegge copy paste position at bottom frame then resize 65 percent.
Select flower02_DSImk01Schnegge copy paste place left side of frame resize 75 percent.
Select box_DSImk01Schnegge copy paste resize 35 percent using your Pick
tool move it around, see tag.
Select heart01_DSImk01Schnegge copy paste resize 40 percent place at bottom of flowers.
Select bow01_DSImk01Schnegge copy paste resie by 35 percent place on heart frames.
Select butterfly_DSImk01Schnegge copy paste resize 25 percent place at top right side of frame
Give all layers a drop shadow 2/2/50/5.

Add your Artist © and your name then crop and save.
This is only a guide and feel free to use any other element you wish.
Most of all have fun creating.
This tutorial was written by Maree (aka Falcon) on 1 October 2010
Any similarities to this tutorial are purely coincidental


Friday, September 24, 2010

Autumn Beauties ♥


Supplies Needed
Tube or Image of choice, I am using the fantastc artwork of PinUpToons
you can find the artwork here at CILM
Scrapkit I am using a great kit called Autumn Romance FTU by Tootypup,
please visit her blog herre
Font: Belphebe
Drop Shadow of choice.
Mask_84 by Weescotslass
Remember to Save Often!!!

Let's begin

Open new image 600 x 600.
Select tp-frame 2 copy paste resize 65 percent.Using Magic Wand
click inside both frames-
Selections -Modify-Expand by 4.
Select tp-paper 4 copy paste as new layer, Selections-Invert-hit Delete,
move below frame layer.
X-out your background layer then Merge visible.
Select tp-bear2 copy paste place on right side see tag, resize as needed.
Select tp-picketfence 2 copy paste place at bottom of layer.
Select tp-tag1 copy paste resize 38 percent and center on fence.
Select tp-dragonfly 2 copy paste resize 45 percent place left side of frame, see tag.
Select tp-flowerste 5 copy paste near your name plate resize as needed.

New layer Select All copy paste into selection tp_paper4b,
Apply Mask - Merge Group.
Duplicate this layer then on original layer Adjust-Blur-Gaussian Blur 30, click ok.
On duplicated layer give this a Drop Shadow.

Add your Artist © and your name then crop and save.
This is only a guide and feel free to use any other element you wish.
Most of all have fun creating.

This tutorial was written by Maree (aka Falcon) on 24 September 2010
Any similarities to this tutorial are purely coincidental
© Maree

Saturday, September 18, 2010

Dreams ♥

Photobucket


Supplies Needed

PSP – I used X2 but will work in any version
Tube of choice
 Font of choice -FrancineHmk
Mask of Choice WSL_84
I used the beautiful artwork of Suzanne Woolcott 
You can  purchase tubes from Here
Scrap kit Alone FTU by BelVidotti Here

Okay let’s get started

Layers open a new image 600 X 600 (we can resize later)
Copy and Paste paper 12 as a new layer
Layers –New Mask Layer –From Image –Ok
Layers –Merge – Merge Layers.
Copy and paste Element 51 frame resize by 50%.
Image - Mirror- then move up to the right hand side.
With the Magic Wand click inside frame
Selelctions - Modify- Expand by 4
Copy and paste paper 2
Selections – Invert – Delete
Copy and paste your tube resize then hit Delete.
Move paper and tube under frame.
Selections – Select none.
Copy and Paste Element 23 Box frame and resize by 40%
Copy and Paste Element 29 flower and resize by 30%
Duplicate and see above  for placement.
Copy and Paste Element 31 flower and resize by  30%
Copy and paste Element 25 clip and resize by 50%.
Image – Free Rotate – 90 degrees Right.
Copy and Paste Element 21 diamond Teardrop resize by 25%.
Duplicate twice and see above for placement.
Copy and Past Element 16 Butterfly resize by 45% place on the left side above the frame.
Copy and Paste Element 27 resize by 50% place between flowers and frame. See above for placement.

Using font - FrancineKmk  size 72
FG #8f1f3a
BG # 000000
Type Dreams then place above the frame on Left side.
Effects -  Grandient Glow 4.00 # white –thin
Then drop Shadow using 2/2/50/5.

On the left side type this size 36
What was Then
        But not Now
Effects -  Grandient Glow 4.00 # white –thin
Then drop Shadow using 2/2/50/5.
Add the Artist © and your name or watermark. Resize and crop.
Save and your done!

I would love to see your result. Thank you for trying my tutorial.
©Maree

Merry Christmas Girls ♥

  
Photobucket


Supplies Needed
PSP – I used X2 but will work in any version
Tube/s of choice
ScrapKit (FTU) First Snow by BlueDreams Designs
Please visit her site Here
 Fonts used: Palatino Linotype and Vivaldi
Mask of Choice
 Brush of Choice
I used the beautiful artwork of  Suzanne Woolcott you will need to
purchase a license to use this work.
You can be purchase from  Here

My Supplies please do not share.

Okay let’s get started

Open a new image 600 X 600 (we can resize later)
Open frame folder and choose a frame I used frame 6
Resize and Duplicate see my tag above
Layers Merge – Layers – Merge Down.
Using Magic Wand click in both frames then
Selections  - Modify – expand by 3
Select paper 11 or a  paper of choice and rezise by 80%
Paste as new layer then Selections – Invert – Delete
Move down under frames.
Don’t Deselect
Copy and past your tube/s -  resize to fit frame/s then hit Delete.
Give these a light Drop Shadow
Move below the frames.
Drop Shadow your frame with
V & H 1
Opacity 75
Blur 5.00
Color:  #000000
Add paper above your background  - and use a mask of choice.
Layers – New Mask-New Image – select mask and hit OK.
Add any Brushes you would like to use.
Click on frame – Select –Preset Shapes
Ellipse use any color -  close off background color
Make a circle and flatten it on top.
Color #a80101 or your choice
Font I used Palatino linotype size 48
Click on vector layer open box and X out the circle then covert to raster
then give this a drop shadow
Repeat this again for the second word then position them as I have above the frames.
Add your artist © and your name or watermark. Resize and crop.

ANIMATIOIN.
If you would like to animate yours then please follow instructions below

Close out all layers EXCEPT  background, mask and paper layer-Merge visible.
Copy and take into animation shop
Paste as a new animation
Hit Crtl  L till you have 10 frames
Open snow gif and select all then copy and paste into frame till you are happy with it.
Back to Psp close out merged background and merge the other layers and copy
Paste in animation shop as new.
Then Edit –Copy and Past into 1st frame making sure you have Propagate Paste button on
This will then copy and paste  into all the other frames.
Click on the View Animation button to view
Save as a Gif and your done!

I would love to see your result. Thank you for trying my tutorial
© Maree

Loving You ♥

Photobucket


Supplies Needed
PSP X2 used but will work in any version.
Plugins - Eye Candy 4000 -  Gradient Glow

I used the art work of Keith Garvey you can purchase
his artwork and license from Here
Template and ScrapKit FTU Heavenly Blue Here
Font of Choice
I used
Engraves Mt and AxelBrush

Lets Get Started

1.   Open Template Ctrl +D and close original Template then delete vector layer( the layer with the copy  
       write on it.

2.    Selection Tool / select freehand and outline one  small heart  then copy and paste postion it below the
       the set see tag for placement then deselect. Now do the same with the other set, you now should have
       4 hearts on each side.

3.    Selection Tools / select Magic Wand click inside large circle then  / Selections / Modify / Expand by 3. 
       Copy / Paste tubes of choice place then where you would like them. Select / Invert / Delete. Layers /
        Merge / Merge Down your tubes.

4.    Do this again with the small heart I used 2 different tubes for this. Give both sets of tubes a light Drop 
       Shadow.

5.    Open loving You scrap kit and select Swirl 12 Copy / Paste. Give a light drop shadow also.

6.    Copy / Past words "forever" and recolor. Adjust / Hue and Saturation / Colorize using these settings,
        Hue : 179 / Saturation: 184 or color to your choice. Add any other Elements if you wish too.

7.     I spelt out the name Garv with color #fa5685 then used Eye Candy / Gradient Glow / whiet.
        Using these settings: 3.00 / 25 / 100 Thin then Effects / with a light Drop Shadow.

8.     Add your name / watermark and Artist  ©.

9.     Click on layer/raster 9 / Select Flood Fill and fill back ground with color of choice.

10.    Resize and crop and save and we  are finished! I would love to see your results.
         Thank you for trying my tutorial.
       

This  tutorial was written by me, Falcon on the 30th January 2010. Any similarity to this turoial is purely coincidental. please do not copy or claim as your own. All my tutorials are registered with TWI.

Sad Times ♥

Supplies Needed
PSp - I used X2 but will work in any version.
Tube of choice I used Suzanne Woolcott  you can purchase her artwork Here 
FTU Scrap kit by Beth Turner - Summer Refreshments -you will find it Here
Mask of choice I used mask WSL_80 Here
Font of Choice - TK Doodle


Lets Get Started!

1.    Layers open / New Image 600 X 600 we can resize later.
2.    Copy and Past Paper of choice then resize by 75%.
3.    Copy / Past eyelet ribbon of choice then resize by 75%. Layers duplicate twice.
4.    Close out background and Layer 1 then, Layers / Merge / Merge visible. Duplicate
        Image / Mirror.
5.    Select your tube, I used the one with the background. Copy / Paste and resize by 85%.
6.    Move the eyelet ribbons to the grey background area of the tube, see above for placement.
7.    Copy / Paste photo corner of choice resize by 95%. Duplicate / Image / Mirror.
       Layers / Merge / merge Down. Duplicate / Image / Flip.
8.    Copy / Paste Flower of choice see tag above for placement.Duplicate / Flip / Mirror.
9.    Copy / Past button resize by 50% and place at top of frame.
10.   Copy / Paste Glass Flowers / resize by 50% and arrange at bottom of frame.
11.   Add a new layer aboe your background layer and Flood fill with #cc9092. Layers / New Mask /
        From Image / select mask wsl_80. Layers / Merge / Merge Group.  Image /  Resize by 110%
        duplicate / Mirror / Flip.
12.   Add your name / watermark and Artist ©. Resize and crop. Save and your done!

This tutorial was written by Maree aka Falcon  on the 26th April 2009. 
Any similarity to this tutorial is purely coincidental. 
Please do not copy or claim as your own,
I would love to see
your results. 
©Maree