Thursday, October 13, 2011

ButterflyRain ♥


My Tutorials are strictly my own creations,
f they resemble another it is purely coincidense.

This was written with the use of PSP X2.
You may create it any version of PSP.

Supplies Needed.

Scrap-Butterfly Rain from Kairinakat Kreations .You can get Here.

Art work ©Tiffany Toland-Scott-stardust. Remember to purchase a license to use
this art work, You can do so Here...CDO

Font: Kelly

Mask:HorsePlay's Pastures HPP_24 Here.

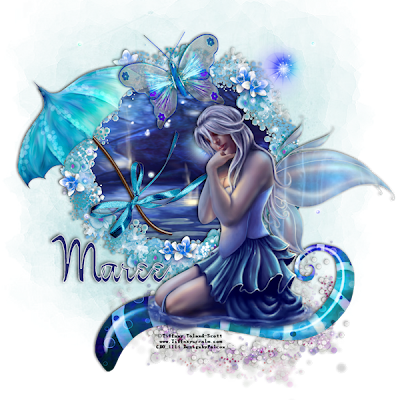
Image is better to have larger to work with then we can crop and resize when completed.

Open 700 X 700 transparent Image.

Select All background layer copy paste ButterflyRain paper TS14,apply mask,merge merge group.Duplicate. Layers Merge Merge down.
Copy paste ButterflyRain Elelments TS 47 click inisde with Magic wand, new layer.
On tube background select the left side of layer copy.Click on new layer and Paste into selection.Deselect.
Copy paste ButterflyRain Elelments TS 32 above frame layer.
Copy paste ButterflyRain Elelments TS 41 Image Mirror arrange below frame to right.
Copy paste ButterflyRain Elelments TS 46 Image Flip arrange on right of layer.
Copy paste ButterflyRain Elelments TS 7 resize 46% Image Mirror arrange on left of layer.
Copy paste ButterflyRain Elelments TS 42 resize 32% arrange on stem of umbrella.
Copy paste ButterflyRain Elelments TS 21 resize 28% arrange in center of frame.
Copy paste your tube resize if needed arrange on right of layer.
Give layers a light drop shadow.

Add your Artist © and your name then crop.
This is only a guide and feel free to use any other element you wish.
Most of all have fun creating.


Written and copyrighted to Maree (aka Falcon) October 2011.
Under no uncertain terms are you allowed to make money
from anything produced from this tut, this is against my TOU's.
Monday, October 3, 2011

Be A Survivor ♥


My Tutorials are strictly my own creations, if they resemble another it is purely coinsidense.

This was wiriten with the use of PSP X2. You may create it any version of PSP.
Supplies Needed.

Scrap kit Think Pink-FTU from Created by Jo.You can get Here

Art work I am using from Ralf Straaberg(FTU) tube. Remember to obtain a license to use this art work, You can do so Here

Font:Johanna Whimsy JF

Mask:HorsePlay's Pasture HPP_03 Here.

Plugin: Xfeno2-Constellation

Image is better to have larger to work with then we can crop and resize when completed.
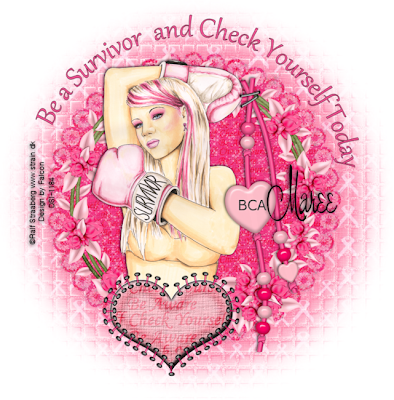
Open 800 X 800transparent Image.
C/P CBJ_ThinkPink_E3 resize 85%.
Apply Constellation with these settings.


C/P CBJ_ThinkPink_E5 resize 90% then add drop shadow.
Add your tube and give it a drop shadow.Arrange to left of layer.
C/P CBJ_ThinkPink_E12 resize 75% arrange on right of E5
add drop shadow.
C/P CBJ_ThinkPink_E16 move this to bottom of tube, see tag.
Add drop shadow.
Select Preset Shape tool/select Ellispe width 2.00 any color.
Closeout your BG color palette.
Draw out a circle larger than the E3 element.
Select your Text tool and copy my wordart or your own.
Click on the + closeout the circle/convert to raster layer.
Give it a drop shadow.
C/P CBJ_ThinkPink_P4 apply mask/merge/merge group.

Add your Artist © and your name then crop.
This is only a guide and feel free to use any other element you wish.
Most of all have fun creating.


Written and copyrighted to Maree (aka Falcon) October 2011.
Under no uncertain terms are you allowed to make money
from anything produced from this tut, this is against my TOU's.
Sunday, July 3, 2011

USA Strong ♥


For this Tutorial you will need.

A Tube of your choice I am using the awesome artwork of ©Elias Chatzoudis ,
which you must have a license to use you can get one at PTE

Elements and Papers are from a scrap kit called Land That I Love by
Jen *Sleek n Sassy* you can find it Here.
Font: Schenidler Blk BT
Drop Shadow of choice.
Mask by *HorsePlay's Pastures*, it's #HPP 11 you can download it Here
Remember to Save Often!!!

Let's create

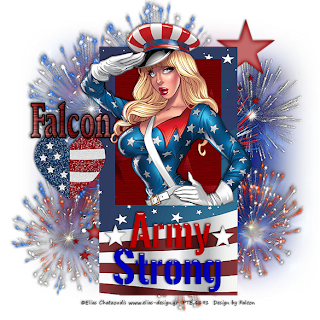
Open new image 700 x 700 transparent background.
Seect frame copy paste click inside with Magic wand selections-Modify-Expnad by 5.
Select paper_2 copy paste position-Selections-Invert-Delete, move below frame layer.
Add drop shadow to frame.
open your tube copy paste position resize if needed, add drop shadow.
Select Heart copy paste resize 55% position on left of frame, add drop shadow.
Select Star_Trail copy paste below paper layer, resize 75%-Image-Mirror
posiition on top right of frame, add drop shadow.
Select Fireworks copy paste below stare layer,add drop shadow then
duplicate-Image-Mirror.
Select WordArt copy paste above flame layer, resize 50% move to bottom of frame,
add drop shadow.
New layer Select all copy paste into selection paper_5, apply mask-merge-merge group. Duplicate-Image-Mirror-Flip.

Add your Artist © and your name then crop and save.
This is only a guide and feel free to use any other element you wish.
Most of all have fun creating.


If you wish to show off your creations.Email me your creation
and I will place it on my show off Page.
Thank you for using my tutorial.


Written and copyrighted to Maree (aka Falcon) on 2nd July 2011.
Under no uncertain terms are you allowed to make money
from anything produced from this tut, this is against my TOU's.
Any similarities to this tutorial are purely coincidental.

Tuesday, June 14, 2011

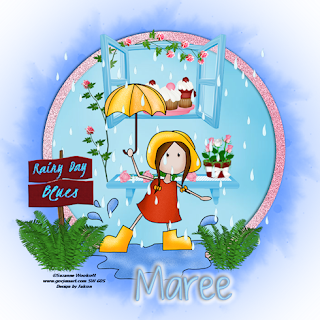
Rainy Day Blues ♥


For this Tutorial you will need.

A Tube of your choice I am using the awesome artwork of © Suzanne Woolcott ,
which you must have a license to use you can get one Here.

Elements and Papers are from a scrap kit Raindrops on Roses FTU by
Zaza *Scrap and Tubes* you can find it Here
Font: Just the way you are and Kristit
Drop Shadow of choice.
Mask*Weescotslass*, it's #wsl_82 you can download it Here
Remember to Save Often!!!

Let's create

Open new image 700 x 700 transparent background.

Open Raindrops on Roses (BNB Blog Train) papers 3 and 4_Scrap and Tubes.
Place paper4 in your Foreground Pattern and paper 3 in Background Pattern.
Using your Preset shape-Ellispe draw out a large circle convert to raster.
With Magic wand click on outside circle(pink)/Adjust/
Add Noise-Guassian 50 tick box click OK.
Open Raindrops on Roses (BNB Blog Train)_Window_Scrap and Tubes/
copy paste resize 25% move to top of frame.
Open Raindrops on Roses (BNB Blog Train)_Plate_Scrap and Tubes/
copy paste resize 19% place onwindow, add drop shadow.

Open Raindrops on Roses (BNB Blog Train)_Cupcake1 & 2_Scrap and Tubes
copy paste resize 14% place on plate, add drop shadow.

Open Raindrops on Roses (BNB Blog Train)_Shelf_Scrap and Tubes,
copy paste resize 23% move to center of frame, add drop shadow.

Open Raindrops on Roses (BNB Blog Train)_Pot of Roses_Scrap and Tubes copy
paste resize 32% move to right of shelf, add drop shadow.

Open Raindrops on Roses (BNB Blog Train)_Rose7_Scrap and Tubes, copy paste resize 19%,Image FreeRotate 90 left,add drop shadow
then duplicate twice, place on shelf.

Add your main tube place at center of layer,and give it a drop shadow.

Open Raindrops on Roses (BNB Blog Train)_Rain_Scrap and Tubes then use
your Pick tool to resize to fit frame.

Open Raindrops on Roses (BNB Blog Train)_Sign Board_Scrap and Tubes,
copy paste resize 32% move to left of frame, add drop shadow.

Open Raindrops on Roses (BNB Blog Train)_Fern_Scrap and Tubes, copy paste resize 26% move to right of frame, add drop shadow.

New layer then floodfill with #699dff apply mask, merge group.

I added the wordart Rainy Day Blues FG:#699dff BG:#00fefb
Font:Kristi 30 Stroke 1.Give it a drop shadow.


Add your Artist © and your name then crop and save.
This is only a guide and feel free to use any other element you wish.
Most of all have fun creating.


If you wish to show off your creations.Email me your creation and I will place it
on my show off Page. Thank you for using my tutorial.


Written and copyrighted to Maree (aka Falcon) on 14 June 2011.
Under no uncertain terms are you allowed to make money
from anything produced from this tut, this is against my TOU's.
Any similarities to this tutorial are purely coincidental.

Monday, May 23, 2011

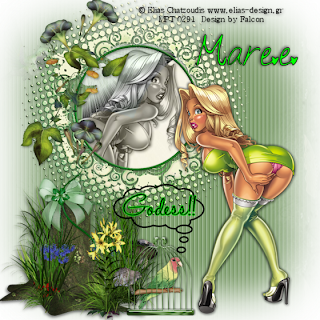
Goddess ♥


For this Tutorial you will need.

A Tube of your choice I am using the awesome artwork of ©Elias Chatzoudis,
which you must have a license to use you can get one at PTE

* Please note that I purchased my tube from MPT *

Elements and Papers are from a scrap kit called Green Goddess by
*Wishing On A Star* you can downland it Here.

Font: He Formed My Heart
Drop Shadow of choice.

Mask *Horseplay's Pasture*, it's #HPP-11 you can download it Here
Remember to Save Often!!!

Let's create

Open new image 650 x 650 transparent background.

Select WishingonaStarr_GreenGoddess_Frame paste as new layer.
Click inside with Magic Wand/selections/Modify/Expand by 6 paste WishingonaStarr_GreenGoddess_paper17 position
so light is at top of cirlce/Selections/Invert/Delete/move below frame.
Add your closeup tube now position hit Delete.
Move below frame/change Blend Mode to Luminance(L)/add a drop shadow.

Select WishingonaStarr_GreenGoddess_Arrangement paste position on left
add drop shadow.
Select WishingonaStarr_GreenGoddess_Bow resize 28% place on top of arrangement
add drop shadow.
Select WishingonaStarr_GreenGoddess_Asiatic lily resize 37% place at front of arrangement, add drop shadow.
Add your Main tube position on right of layer, add drop shadow.
Select WishingonaStarr_GreenGoddess_Caged bird resize 65% move to center
add drop shadow.
Select Preset tool/callout 04 width -4 draw out above bird cage, see tag.
I used #000000.
Type the word Goddess!! FG:00ff00 BG:000000 Stroke 1.Place inside callout shape.
Select WishingonaStarr_GreenGoddess_Paper14 paste as background layer/
apply mask/merge group..

Add your Artist © and your name then crop and save.
This is only a guide and feel free to use any other element you wish.
Most of all have fun creating.


If you wish to show off your creations.Email me your creation and I will place it
on my show off Page. Thank you for using my tutorial.


Written and copyrighted to Maree (aka Falcon) on 2011.
Under no uncertain terms are you allowed to make money from anything
produced from this tut, this is against my TOU's.
Any similarities to this tutorial are purely coincidental.

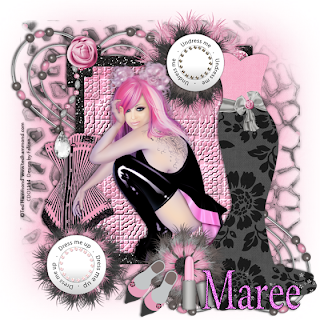
Undress Or Dress Me Up ♥


For this Tutorial you will need.

A Tube of your choice I am using the awesome artwork of © Ted hammond ,
which you must have a license to use you can get one at CDO

Elements and Papers are from a scrap kit called Dress Me Up(Old PTU Now FTU) by *Cinnamon Scraps* you can downland it Here.
Font:
Drop Shadow of choice.
Mask *HorsePlay's Pasture*, it's #11 & 16 you can download it Here
Remember to Save Often!!!

Let's create

Open new image 650 x 650 transparent background.

Select CS_dressmeup_frame3/click iside with Magic wand/
selections/Modify/Expand by 5.
Open CS_dressmeup_paper3 paste as new layer/Selections/Invert/
Delete/move below frame layer.
On paper layer Effects/Textures/Mosaci weave with these settings:

Add a drop shadow to frame layer.

Add your tube now add drop shadow to it.

Select CS_dressmeup_dress1 paste move to right of frame/
add drop shadow.
Select CS_dressmeup_corset1 paste move to left of frame/
add drop shadow.
Select CS_dressmeup_flower 1/2/3 resize all to 38%/see tag for placement/
add drop shadow.
Select CS_dressmeup_brad1 an 2 paste resize both 32% position on top of flower/see tag.
Add drop shadow.
Select CS_dressmeup_hangingcharm2 resize 30% move to top left of frame/
add drop shadow.
Select CS_dressmeup_littleflower1 resize 15% mplace on top of charm
/add drop shadow.
Select CS_dressmeup_lipstick1 resize 16% then position at bottom of frame.
Select CS_dressmeup_shoes1 resize 19%/use your Pick Tool-angle to the right
add drop shadow.
Select CS_dressmeup_beadedheart paste below paper layer/
duplicate/Image/Mirror/Flip.

New layer select all copy paste into selection CS_dressmeup_paper9/
apply mask 16/merge group.
New layer select all paste into selection CS_dressmeup_paper12/
apply mask 11/merge group.
Add your Artist © and your name then crop and save.

This is only a guide and feel free to use any other element you wish.
Most of all have fun creating.


If you wish to show off your creations.Email me your creation and I will place it
on my show off Page. Thank you for using my tutorial.


Written and copyrighted to Maree (aka Falcon) on 23rd May 2011.
Under no uncertain terms are you allowed to make money from
anything produced from this tut, this is against my TOU's.

Any similarities to this tutorial are purely coincidental.

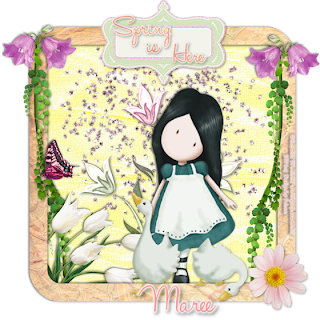
Spring Is Here ♥


For this Tutorial you will need.

A Tube of your choice I am using the awesome artwork of © Suzanne Woolcott ,
which you must have a license to use you can get one at GorjussArt

Elements and Papers are from a scrap kit called Freshness of Spring by
Melissa *P & A Designs*you can download it Here.

Font: HaloHandletter
Drop Shadow of choice.

Remember to Save Often!!!

Let's create

Open new imag700x700.
Open Paper8/open Material palette find it in Pattern-select.
Click on PresetTool-rounded rectangle-width 45 draw out frame to it layer.
Give a drop shadow using Lokas 3D shadow-30.

Click inside with Magic wand/selections/Modify/Expand by 4/open paper13
paste as new layer.
Selections/Invert/Delete/move below frame layer.
Open scatter3 paste above paper layer.

Open Flourish1 paste above scatter add a drop shadow.
Add your tube give a drop shadow.

Open Flower 3 reize 65% paste move to left of frame,
add drop shadow.
Open vine1 place on side of frame/duplicate/Image/Mirror,
add drop shadow.
Open Flowere1 resize 43% place on top of vine, see tag for placement,
add drop shadow.
Open Butterfly3 resize38% position on vine left side,
add drop shadow.
Open Label3 resize 34% position on top of frame.
add drop shadow.
Open Flower2 resize 23% position bottom right of frame,
add drop shadow.
I also add the geese that came with my tube position them at bottom of frame,
add drop shadow.
I used #f89999 color with a Gradient Glow-white for the wordart "Spring is Here",
add a drop shadow of 2/2/40/8.

Add your Artist © and your name then crop and save.
This is only a guide and feel free to use any other element you wish.
Most of all have fun creating.


If you wish to show off your creations.Email me your creation and I will place it
on my show off Page. Thank you for using my tutorial.


Written and copyrighted to Maree (aka Falcon) on 23rd May 2011.
Under no uncertain terms are you allowed to make money from anything produced from this tut,

this is against my TOU's.
Any similarities to this tutorial are purely coincidental.

Wednesday, May 18, 2011

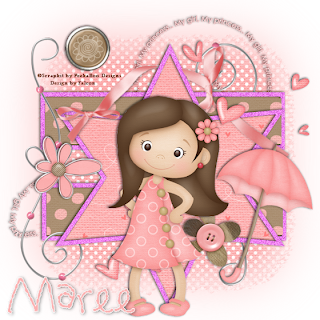
My Girl My Princess ♥


For this Tutorial you will need.

Elements and Papers are from a scrap kit called My Dear Daughter-FTU by *Peek A Boo Designs* you can find it Here.
Font: AL Amusement
Drop Shadow of choice.
Mask*HorsePlays Pastures*, it's #14 you can download it Here
Remember to Save Often!!!

Let's create

Open new image 650 x 650.
Select your Preset Tools draw out a rectangle (width 10) not to large, FG:ff80ff
Close out BG:,click inside with Magic wand select PABD_mydeardaughter_paper_03
paste as new layer/selections/Invert/Delete/move below.
Right click Merge down.
Select Magic Wand click on outer frame then apply these settings:


Duplicate layer, move down see tag for placement.
Create a star with your Preset tool repeat above this time using PABD_mydeardaughter_paper_02.
Select PABD_mydeardaughter_swirl i paste above oblong shapes layer resize 35%,
add drop shadow then duplicate move below oblong shape layer.

Select PABD_mydeardaughter_bow2 resize 18%/Image/FreeRotate90 left/
place at top of star then

using your Freehand selection tool erase part of ribbon in front/add drop shadow.
Select PABD_mydeardaughter_heart_02 resize 25% move about till your happy with placement, add drop shadow.
Select PABD_mydeardaughter_flower_02 resize 18% move to lower right of layer
, add drop shadow.
Select PABD_mydeardaughter_umbrella_01 resize 21% move to right of layer,
add drop shadow.
Select PABD_mydeardaughter_girl_01 resize 65% move to center of layer,
add drop shadow.
Select PABD_mydeardaughter_flower_03 resize 14% move to center left of layer,
add drop shadow.
Select PABD_mydeardaughter_button_05 resize 15% move to top left of layer,
add drop shadow.
Select PABD_mydeardaughter_wordart_03 resize 35%paste above background layer/Adjust/Hue and Saturation/Colorize H-255/S-255,
add drop shadow.
Select PABD_mydeardaughter_paper_01/apply mask/merge group.

Add your Artist © and your name then crop and save as png.
This is only a guide and feel free to use any other element you wish.
Most of all have fun creating.


If you wish to show off your creations.Email me your creation and I will place it
on my show off Page. Thank you for using my tutorial.


Written and copyrighted to Maree (aka Falcon) on 18th May 2011.
Under no uncertain terms are you allowed to make money from anything
produced from this tut,

this is against my TOU's.
Any similarities to this tutorial are purely coincidental.

Sunday, May 1, 2011

Girlz Only ♥


For this Tutorial you will need.

A Tube of your choice I am using the awesome artwork of © Zlata_M ,
which you must have a license to use you can get one at PFD

Elements and Papers are from a scrap kit called Girlz by Bea *Bea's Creations*
you can find it Here. Please leave some love!!
Font:
Drop Shadow of choice.
Mask by *Dee's Designs Depot*, it's #13 you can download it Here
Remember to Save Often!!!

Let's create

Open new image 700 x 700 fill with #ffffff.
Select frame02_bc_girlz_freebie, click inside frame with Magic Wand/
Selections/Modify/Expand by 10/ paste p05_bc_girlz_freebie
Selections/Invert/delete move below frame layer.
Paste your closeup tube in frame/position/hit delete/
move below frame/De-select.
Apply blend mode Luminace(Legacy).

Select fan01_bc_girlz_freebie place on right of layer resize 45%.
Select ribbon02_bc_girlz_freebie move to right of layer.
Select dice01_bc_girlz_freebie, move to top right of frame

Select lipstick01_bc_girlz_freebie move to lower right of layer reisze 36%.
Select ribbon01_bc_girlz_freebie move to left of frame.
Select candle01_bc_girlz_freebie move to left of frame, resize 42%.

Select butterfly01_bc_girlz_freebie, place above frame right side resize 24%.
Selectbow03_bc_girlz_freebie, place to left corner of frame,duplicate place
on frame corner right side.
Select boot01_bc_girlz_freebie,Image/Mirror/move to lower right of frame/
duplicate move down slightly/see tag.

Select deco09_bc_girlz_freebie,place on left of frame/resize 20%.
Select bunny02_bc_girlz_freebie,resize 65% move to left of dice.
Add your main tube place on top of dice.

On bunny layer using selection tool select right side of bunny head/
right click and Promote Selection to Layer.
Carefully using your Eraser tool on duplicated layer to show all hand.

Select wire01_bc_girlz_freebie paste above background layer.
Select deco01_bc_girlz_freebie move to top left of layer/duplicate/Image/Flip/Mirror
New layer above background,select allpaste into selection
p10_bc_girlz_freebie/apply mask/merge group.

Give all layer a Drop Shadow of choice.


Add your Artist © and your name then crop and save.
If you wish to Animate please continue.
This is only a guide and feel free to use any other element you wish.
Most of all have fun creating.

Now to Animate.
On your frame layer duplicate it twice, rename 1,2,3.
Click on layer 1 then Effects-Xenofex 2 Constellation with these settings:
Apply this to layer 2 click the random seed then ok, repeat again for 3.

Open AS back in Psp X-out frame layers 2/3.Edit/Copy Special/Copy Merged.
In AS paste as new animation.
Click into Psp X-out 1 open 2 make sure you have it highlighted,
then repeat above this time pasteing after Current frame.
Repeat for Frame 3 layer.
Check your animation then save as a Gif.
Email me your creation, so I can show off your creations on my blog.
Thank you for using my tutorial.


Written and copyrighted to Maree (aka Falcon) on 1st May 2011.

Under no uncertain terms are you allowed to make money from anything
produced from this tut, this is against my TOU's.
Any similarities to this tutorial are purely coincidental.

Saturday, April 30, 2011

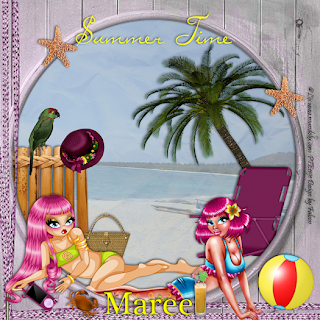
SummerTime ♥


For this Tutorial you will need.

A Tube/s of your choice I am using the awesome artwork of ©Lix ,
which you must have a license to use you can get one at PTE

Elements and Papers are from a scrap kit called Anja by Bea (*Bea Creations*)
you can find it on her blog Here.
Please leave some love...

Font:Plantagenet Cherok
Drop Shadow of choice.

Remember to Save Often!!!

Let's create

Open new image 650 x 650.

Select p11_bc_anja paste as new layer.
Open tree01_bc_anja move to right of layer.
Open chair01_bc_anja reize 75% move to right of layer.
Open deco04_bc_anja move to left of layer.
Open frame09_bc_anja and resize 200%.
Open your tube/s place then with eraser tool remove anything
overhanging the frame.
It's best if you zoom out to give you a larger area wo work with.

Open hat01_bc_anja resize 42% move to edge of fence,
using your Pick Tool to angle slightly.
Open bag01_bc_anja resize 34% move to left of layer.
I add the beach ball from my tube resize to 35% move to right of frame.

Open deco06_bc_anja move to top of frame position then duplicate/Image/mirror.
Open crabe01_bc_anja resize to your liking then position on left of frame.

Open drink01_bc_anja resize 23% move to center of layer.
Open plaer01_bc_anja resize 18% move to left of frame.

Give all a Drop Shadow.

Add your Artist © and your name then crop and save.
This is only a guide and feel free to use any other element you wish.
Most of all have fun creating.

Email me your creation, so I can show off your creations on my blog.
Thank you for using my tutorial.

Written and copyrighted to Maree (aka Falcon) on 30th April 2011.
Under no uncertain terms are you allowed to make money from
anything produced from this tut, this is against my TOU's.

Any similarities to this tutorial are purely coincidental.

Saturday, April 16, 2011

Sweet Life ♥


Supplies Needed

I'm using the artwork of ©PinUpToons, you can purchase tube Here
Scrap kit by Thaliris Designs & Chouk77 called Collab Lovely Poppies Part7 Here
Free-Limited Time.
Font: AbagailJackson
Drop Shadow of choice.
DBV_Mask120 Here
Remember to Save Often!!!

Let's create

Open new image 650 x 650.

Select chouk77_pop07_element 02 copy paste resize 65%
Select thaliris_lovelypoppies_el 16 copy paste resize 15%
Select thaliris_lovelypoppies_el 07 resize 17% move to right of frame.
Select thaliris_lovelypoppies_el 13 resize 11% move to right of frame,
using your Pick tool to straiten the flower.
Select thaliris_lovelypoppies_el 10 resize 10% move to right of el13 then
duplicate/Image/Mirror place on other side of el13.
Select thaliris_lovelypoppies_el 01 resize 19% move to right of frame.
Select chouk77_pop07_element 05 resize 21% move to left of frame.
Select thaliris_lovelypoppies_el 03 resize 12% move to top left of frame.
Select thaliris_lovelypoppies_el 09 resize 8% place on top of el 09.
Select thaliris_lovelypoppies_el 14 resize 15% move to left of layer.
Click on Paint Brush using FG: #83e5ff place a couple of blobs of paint on easel.
Click on Smear brush,just on edge of color push outward to give a smear effect,
do this till you are happy with result.
Select chouk77_pop07_element 07 resize 24% place on center of easel.
Add your tube of choice move to center of layer.
Select chouk77_pop07_element 10 resize 17%/Image/Mirror/ move to the right.
Select chouk77_pop07_element 01 resize 15% move to top left of frame.
Select chouk77_pop07_element 03 resize 14% place top right corner of frame.
Use your Pick tool to angle the element.
Click on Selection Tool draw out rectangle to fit frame, new layer paste into selection,
chouk77_pop07_paper 02/deselect.
New laye/select all copy paste into selection chouk77_pop07_paper 05
apply mask/merge group.
Give all a Drop Shadow.

Add your Artist © and your name then crop and save.
This is only a guide and feel free to use any other element you wish.
Most of all have fun creating.

Email me your creation, so I can show off your creations on my blog.
Thank you for using my tutorial.

Written by © Maree (aka Falcon) on 16th April 2011.
Any similarities to this tutorial are purely coincidental.

Friday, April 8, 2011

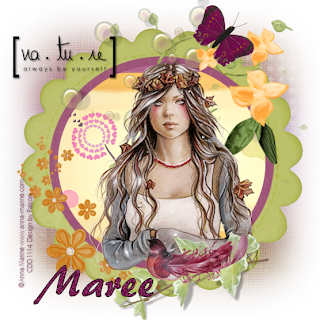
Always Be Yourself ♥


Supplies Needed

I'm using the artwork of © Anna Marine, you can purchase tube Here
Scrap kit by BellisaDesigns called Lovely Poppies Collab kit (6) Here

Be quick as this is Limited TimeFreebie

Font: Brush445 BT
Drop Shadow of choice.
HorsePlays Pasture Mask_11 Here
Remember to Save Often!!!

Let's create

Open new image 650 x 650.
Open SekadaDesigns_lovelypoppies_element 2 resize 68%,then open SekadaDesigns_lovelypoppies_elements16 move to inner edge of frame.

click inside frame with Magic Wand/Select all/Modify/Expand by 4 copy and paste
line_lovelypoppies_papier 04 resize paper 39%(you will pattern beter).Selections/Invert/Delete/move below frame layer.

Open BellisaeDesigns_lovelypoppies_element 3 resize35% move to top right of frame.
Open SekadaDesigns_lovelypoppies_element 07 resize 45% move to top of frame.
Open BellisaeDesigns_lovelypoppies_element 10 resize 35% move to right of frame.
Open your tube resize if needed and paste into frame.
Open SekadaDesigns_lovelypoppies_element 15 resize 24% ove to left of frame.
Open line_lovelypoppies_element 13 resize 39% Image/Mirror/
move to center bottom of frame.
Open BellisaeDesigns_lovelypoppies_element 11 resize 39% move to top right of layer.
Open SekadaDesigns_lovelypoppies_element 4 resize 28% move over the leaves.
Open BelliseaDesigns_lovelypoppies_element 9 resize 19% move to top of layer.
Open BelliseaDesigns_lovelypoppies_element 7 resize 39% move to top left of layer.
New layer select all open SekadaDesigns_lovelypoppies_paper5
paste into selection.Apply mask merge group.

Add your Artist © and your name then crop and save.
This is only a guide and feel free to use any other element you wish.
Most of all have fun creating.

Email me your creation, so I can show off your creations on my blog.
Thank you for using my tutorial.

Written by © Maree (aka Falcon) on 8th April 2011.
Any similarities to this tutorial are purely coincidental.

Sunday, April 3, 2011

Lady Luck ♦


Supplies Needed

I'm using the artwork of© Cane Hoyer , you can purchase his tubes Here
Scrap kit by Kim's Korner called Waking Up In Vegas FTU Here
Font: Of Choice
Drop Shadow of choice.
HorsePlays Pasture mask_11 Here
Remember to Save Often!!!

Let's create

Open new image 650 x 650.
Background #ffffff and Foreground #000000
Using your Preset Tools draw out a rectangle not to large.
Click on out white area with Magic Wand/Adjust.Add Noise Uniform 10.
Duplicate layer.
On first layer click black area copy paste your tube/Layers/Merge down.
Repeat with the frame layer 2.
Add your main tube between the frames.
Open kk_WUIV_Freebie_cards duplicate/Image/Mirror,move them around
till your happy with placement.
Open kk_WUIV_Freebie_Wordart01 resize 65% move to center of layer.
Open kk_WUIV_Freebie_Bling-Star resize 45% duplicate and place on either side of frames/layers/merge down.
Open kk_WUIV_Freebie_Paper03/ new layer/selections/select all paste into selection/deselect.
Apply the mask then apply Graphic Plus-Tinted Glass with these settings:


If you wish to Animate the stars please continue.
Add your Artist © and your name then crop and save.
This is only a guide and feel free to use any other element you wish.
Most of all have fun creating.

Animation Shop

Open Animation shop then click back into Psp.
1.Click on star layer/Adjust/Add Noise/Uniform-30/click in AS paste as new animation.
2.Click back to Psp click Undo then repeat above using 35 then in As- paste
after current frame.
3.Click on undo then Repeat above using 40 again past after current frame.
Check your animation and if you are happy then Save as a Gif.


Email me your creation, so I can show off your creations on my blog.
Thank you for using my tutorial.

Written by © Maree (aka Falcon) on 3rd April 2011
Any similarities to this tutorial are purely coincidental

Saturday, March 19, 2011

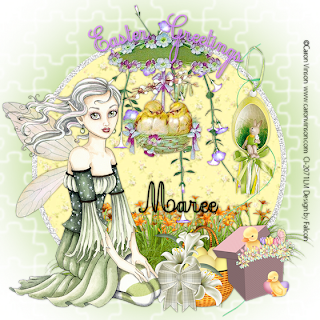
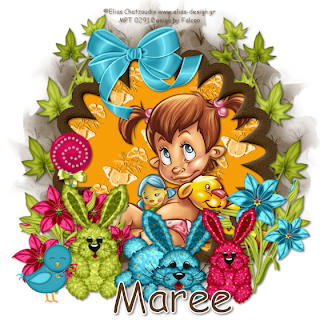
Easter Greetings ♥


Supplies Needed

I'm using the artwork of ©Caron Vinson,
my license is for CILM and you now can find this artist Here
Scrap kit by WishingonaStar called Sunny Easter FTU Here
Font: Ecolier
Drop Shadow of choice.
HorsePlay's Pastur mask_12 Here
Remember to Save Often!!!

Let's create

Open new image 700 x 700 FloodFill with #ffffff.llipse
Select WishingonaStar_Paper6 minimize.
In your Material pallet BG: select Pattern and FG: select#ffffff.
Open Preset/draw a large circle/convert to raster.
Using your Magic Wand select out circle(white) then Adjust/
Add Noise:Guassian 50 tick box-Monochrome.

New layer above background layer FloodFill with #b4d47e/apply mask/merge group.
Select WishingonaStar_SunnyEaster(57) resize 85% move to top of circle.
Select WishingonaStar_SunnyEaster(15) resize 75% move to top of circle.
Select WishingonaStar_SunnyEaster(56) move to bottom of circle.

Select WishingonaStar_SunnyEaster(38) resize 45% move to center of flowers.
Select WishingonaStar_SunnyEaster(7) resize 46% move to right of layer.
Select WishingonaStar_SunnyEaster(8) move to right of circle.
Select WishingonaStar_SunnyEaster(25) resize 48% move over ribbon.

Add your tube place on left of layer.
Give all a drop Shadow 2/2/60/5.
I used Stroke 2-FG:#000000 and BG:b4d47e for my name.

Add your Artist © and your name then resize 80% and save.
This is only a guide and feel free to use any other element you wish.
Most of all have fun creating.

Email me your creation, so I can show off your creations on my blog.
Thank you for using my tutorial.

Written by © Maree (aka Falcon) on March 2011
Any similarities to this tutorial are purely coincidental.

Friday, March 18, 2011

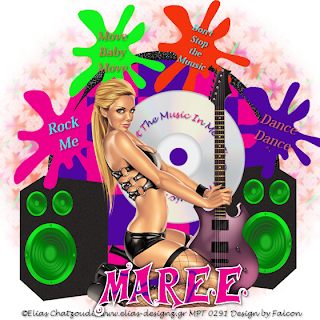
I'v Got The Music In Me


Supplies Needed

I'm using the artwork of ©Elias Chatzoudis, you purchase his artwork Here
Scrap kit by Kim's Korner called Dont Sop the Music FTU Here
Font:Musicals
Drop Shadow of choice.
HorsePlay's Pasture mask_13 Here
Remember to Save Often!!!

Let's create

Open new image 650 x 650.
Open kk_DSTM_paper08, minimize,open Material-Pattern and find paper
for background then change your FG: to #000000.
Select Preset Shapes find Elispe width 20.00, draw out a Medium size
circle/Objects/Align/center in canvas.
Using your Magic Wand click on outer circle/ Adjust/Add Noise:
using these settings:


Select kk_DSTM_Speakers07 then duplicate move till you happy with placement
Add your tube I place mine between the speakers.
Select kk_DSTM_PCD resie 85% move to center of layer.
I typed the words Don't Stop The Music
but you can add your own selection.

Select kk_DSTM_Splat 01,02,03and 04 paste these around your tube.
I add some text to these.
You can add your own.
Open kk_DSTM_Paper05 and apply the mask/Merge/Merge group.
Give all a Drop shadow.

Add your Artist © and your name then crop and save.
This is only a guide and feel fr ee to use any other element you wish.
Most of all have fun creating.


Email me your creation, so I can show off your creations on my blog.
Thank you for using my tutorial.

Written by © Maree (aka Falcon) on March 2011
Any similarities to this tutorial are purely coincidental

Saturday, March 5, 2011

Bunny Love ♥


Supplies Needed

I'm using the artwork of © Elias Chatzoudis,this tube was purchased from MPT,
you now can find it Here

Scrap kit by Black Widow Creationz called FTU Bunny Hop BT Here

Font: Cosmic Sands MS
Drop Shadow of choice.
HorsePlays Pastures mask_34 Here

Remember to Save Often!!!

Let's create

Open new image 600 x 600 floodfill with #ffffff.
New layer select all open BWC_BunnyHopBT_PP4 paste into selection/
deselect appply mask, merge group.
Open BWC_BunnyHopBT_El35 paste as new layer,Click inside frame Magic Wand

Selections/Modify/Expand by4 select/paste BWC_BunnyHopBT_PP8/
selections/Invert/hit Delete, move below frame.

Add your tube paste below frame layer resize if needed.

Open BWC_BunnyHopBT_El16 resize 85% move below frame move to left/duplicate/Image/Mirror.
Open BWC_BunnyHopBT_Ele 30 resize 53% place behind flowers.
Open BWC_BunnyHopBT_Ele 10,11 and Ele 15 resize as needed place next to frame.

Open BWC_BunnyHopBT_Ele 5 resize 65% place top of frame,
Open BWC_BunnyHopBT_Ele 18,19 and Ele20 resize as needed,
place in front of frame to your liking.

Open BWC_BunnyHopBT_Ele 26 resize 65% place left side of layer.
Give all a light Drop Shadow.
I used FG:#ffffff and BG:#563e21 for my name.

Add your Artist © and your name then crop and save.
This is only a guide and feel free to use any other element you wish.
Most of all have fun creating.

Email me your creation, so I can show off your creations on my blog.
Thank you for using my tutorial.

Written by © Maree (aka Falcon) on 6th March 2011
Any similarities to this tutorial are purely coincidental

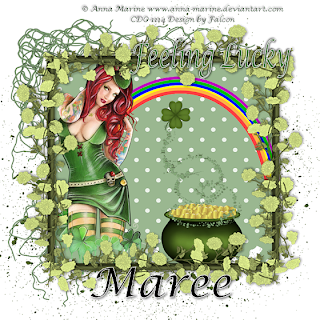
Feeling Lucky ♥


Supplies Needed

I'm using the artwork of ©Anna Marine , you find it Here
Scrap kit by Maxi Scraps FTU called St Patrick Day BT Here
FontLucinda Calligraphy
Drop Shadow of choice.

Remember to Save Often!!!

Let's create

Open new image 650 x 650.
Open ss-m-patrick-day-frame 04 resize 75% click inside with Magic wand Selections/modify/expand by 4/select ss-m-patrick-day-pp16
/selections/Invert/hit delete/move below frame layer.

Open ss-m-patrick-day-Element11 paste above backgroundlayer.
Open ss-m-patrick-day-Element76 resize 75% move to top left of frame.
Open ss-m-patrick-day-Ele 20 resize 18% move to left of layer.
Add your tube place on left of layer.

Open ss-m-patrick-day-element 55 resize 45% move up half way inside frame.
Open ss-m-patrick-day-element 50 resize 18% move to right of frame.
Open ss-m-patrick-day-Element40 resize 20% move over the pot of gold.
Open ss-m-patrick-day-Element57 resize 10% place under rainbow
I used Drop Shadow 2/2/50/5.

Add your Artist © and your name then crop and save.
This is only a guide and feel free to use any other element you wish.
Most of all have fun creating.


Email me your creation, so I can show off your creations on my blog.
Thank you for using my tutorial.

Written by © Maree (aka Falcon) on 6th March 2011
Any similarities to this tutorial are purely coincidental

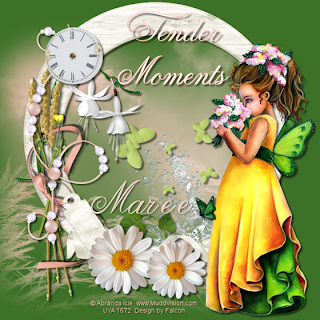
Tender Moments ♥


Supplies Needed

I'm using the artwork of ©Abranda Icle, you find it Here
Scrap kit by Ya Ya called Tenderesse Pastel Here
Font: Anglia Script
Drop Shadow of choice.
HorsePlay's Pastures mask_22 Here
Remember to Save Often!!!

Let's create

Open new image 650 x 650 floodfill with #3c7127.
New layer Selections/select all copy paper17 paste into selection, applymask.
Open ele 45 resize35% center onlayer.
Open ele 36 resize 23% paste below frame move to right.
Open ele 19 resize 15% Image/Flip move to right.
Open ele 2 resize 12% move to top left of frame.
Open ele 33 resize 11% place left side of frame, see tag.
Open ele 9 resize 12%, Image/FreeRotate 90 left move to bottom of frame.
Open ele 41 resize 15% move to bottom of frame, see tag.
Open ele 25 resize 16% move left of frame/Image FreeRotate 90 left.
Open ele 4 resize 13% move to left of frame.
Open ele 16 resize 11% using Pick tool move it over bead element
then using eraser.,rub out part of the string over beads.
Add your tube place on right of layer.
Open ele 22 resize 22% duplicate resize duplicated layer 85%,
place both at bottom of frame.
Give all elements a Drop Shadow 2/2/50/4.

Add your Artist © and your name then crop and save.
This is only a guide and feel free to use any other element you wish.
Most of all have fun creating.

Email me your creation, so I can show off your creations on my blog.
Thank you for using my tutorial.

Written by © Maree (aka Falcon) on 5 March 2011
Any similarities to this tutorial are purely coincidental

Friday, March 4, 2011

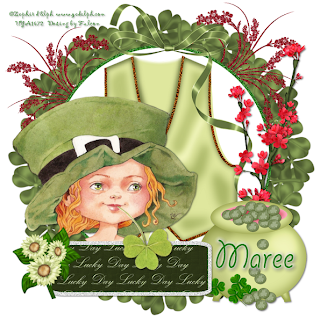
Lucky St Pat's Day ♣


Supplies Needed

I'm using the artwork of ©Zephir d'Elph , you find it Here
Scrap kit by Fantasy Dreams Designz called St partrick's
FTU you can download kit Here
Font: Giddyup Std
Filter:
MuRa Filter Meister-Copies

Remember to Save Often!!!

Let's create

Open new image 650 x 650.
Select ele12 resize45%/duplicate/merge/merge down, then apply MuRa Filter/Copies:


Select Preset tool, I used colours FG:#147604 BG:ffffff, draw out a large circle/
Objects/Align/Center in Canvas.Using Magic Wand
select the green on frame then Adjust/AddNoise/


Select ele34 paste below frame,move to left then Duplicate/Image/Mirror.
Select ele19 place in center of frame.
Select ele15 resize 85% move to top center of frame.
Open your tube then paste on left of frame.
Select ele8 resize 80% Image/Mirror. move to right of frame.
Select ele1 resize 75% move to right of frame.
Select Prest shape using the same as before but change the shape to Rounded Rectangle:

using the arrow change your colors draw out med rectangle.
Using Magic wand select inside of
frame/ Selections/Invert/hit Delete/select paper2 resize 65%
move over frame/hit delete,deselect, move below frame.

Select white frame using Magic wand then add Noise, same as above.
Select ele5 resize 45% place on left of frame.
Give all a Drop Shadow 2/2/50/5.

Add your Artist © and your name then crop and save.
This is only a guide and feel free to use any other element you wish.
Most of all have fun creating.

Email me your creation, so I can show off your creations on my blog.
Thank you for using my tutorial.

Written by © Maree (aka Falcon) on 5th March 2011
Any similarities to this tutorial are purely coincidental

Saturday, February 26, 2011

My Precious Panda's ♥


Supplies Needed
Scrap kit by Scrapin Designs called Precious Pandas-Peace Here
Please leave some love for this Designer.Was PTU now FTU
Font: BatangChe
Drop Shadow of choice.
Textured Masks-Geometric squares(in Psp)

Remember to Save Often!!!

Let's create

Open new image 600 x 600.
Open paper 1 new layer select all paste into selection apply mask
(can be found in your Textured Mask that came with psp)
deselect,Merge.Merge group.
Open frames 4 and 5 resize both 22%, then using your Pick Tool pull them out
so they are both same size.
Click inside farme 4 with Magic Wand making sure to get all the areas around the bamboo.Selections/modify/Expand 4.
Open paper9 resize30 paste line up the design on side of paper,
Selections/Invert/hit delete move below frame. Repeat for frame 5.
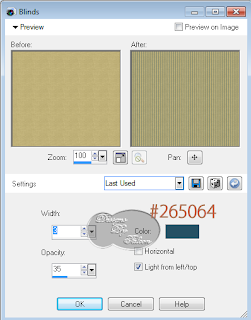
Effects/Textured Effects/ Blinds apply these settings below
to both door papers.


Open BambooBranches resize 22% duplicate/image/mirror.
Add your text I used FG:a87859 BG:ffffff .Place on right side
of layer-middle section of window.
Open Butterfly 4 resize 12% move to top of text.
Open Precious panda and Precious panda0 resize both 24% place at bottom of frames.

Add your Artist © and your name.
This is only a guide and feel free to use any other element you wish.
Most of all have fun creating.

Animation
1.Open As click back into Psp Edit/Copy special/Copy Merged click on As and
paste as New Animation.
2. Back in Psp close out both blind layers, Copy Special/Copy Merged, click into As,
Edit/paste/ After current frame.
3. Click on 1st frame,Effects/Insert Image Transition/ with these settings:

4. You now have 21 frames, click on 1st frame then,
Animations/Frame Properties/change to 100.
5. Click on last frame and repeast above again.Check your animation, save a Gif.

Email me your creation, so I can show off your creations on my blog.
Thank you for using my tutorial.

Written by © Maree (aka Falcon) on 27th February 2011
Any similarities to this tutorial are purely coincidental